BOJIT V3 - Guitar Build
25-06-2021
A few years back I made a fully-homemade electric guitar. This has served me well for a long time, however there were a few bug bears I had with it:
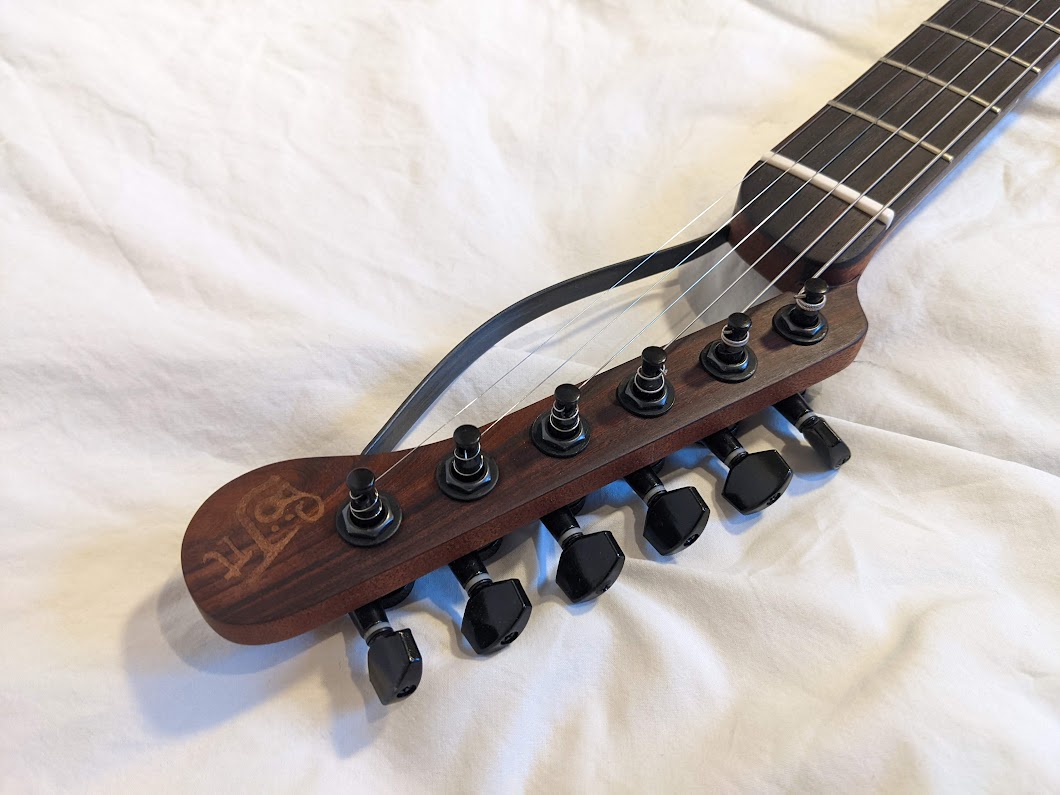
The steel neck reinforcements make it very neck-heavy. However, I do like the very minimal headstock design, so I needed to find a more suitable construction method.
The removable back panels and layered construction make the edges of the guitar quite sharp.
The steel reinforcement strips make fitting standard pickups impossible, and make the neck profile impractically chunky.
It is very heavy!
With all of these issues in mind, I decided it was time for the next build! The global pandemic may have also persuaded me to start a long woodworking project!
I rebuilt the old CAD from the GCSE project with a new refreshed design. If you have Javascript enabled, you can explore the CAD model below.
A few key features of the new build include:
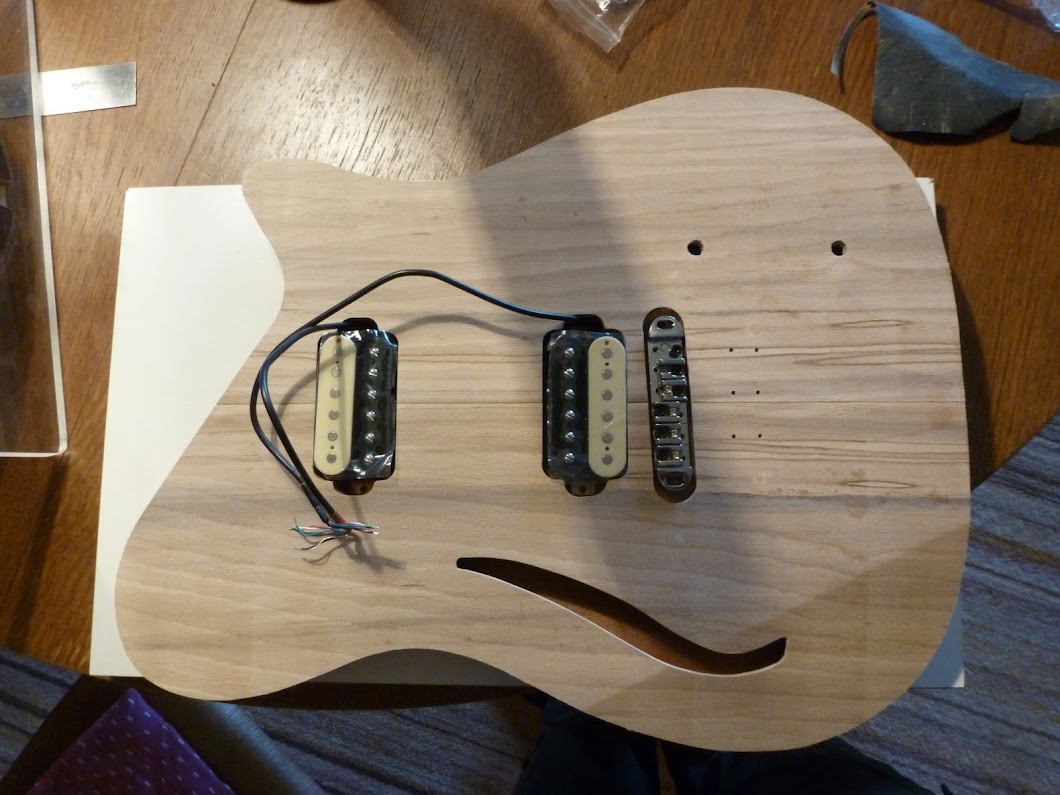
Ultra-thin body and lightweight design.
Standard humbucker pickup mounts without affecting the structural integrity of the neck joint.
A prototype hidden tremolo & B-bender system (more on that later…)
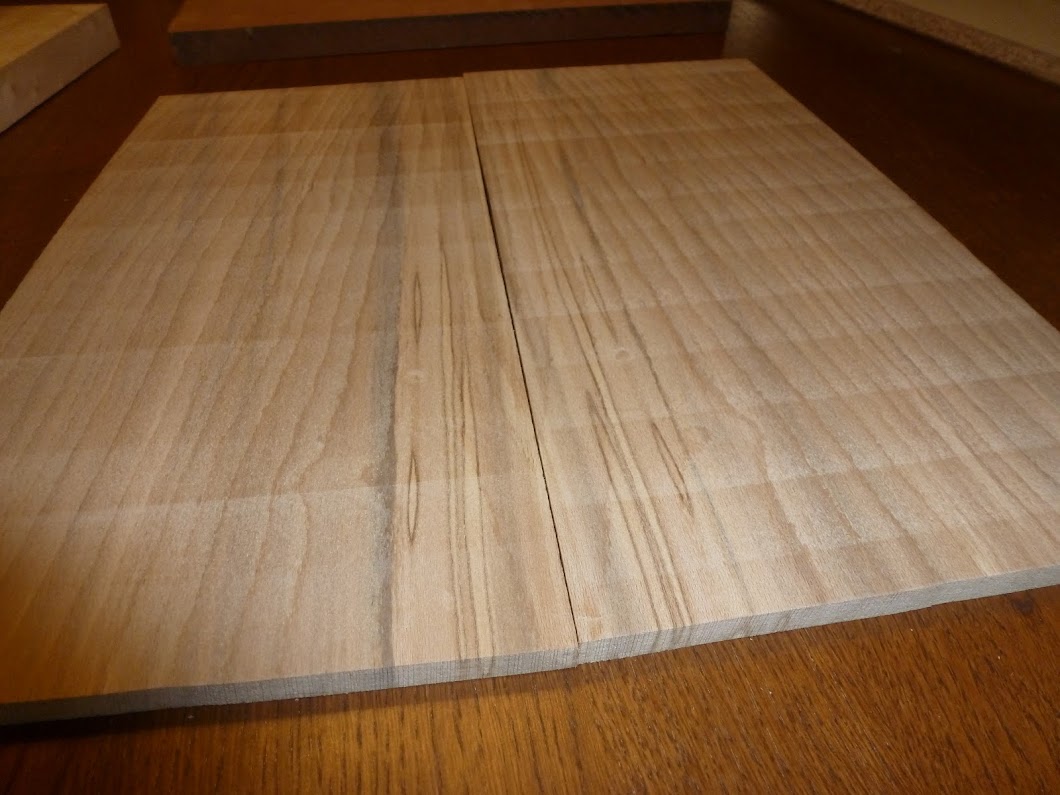
I was very fortunate to get given a large slab of mahogany from a friend that I could use for the majority of the construction. In an homage to the old guitar, I found some spalted beech to make a bookmatched top from. With the design mostly finalised, I started on the build!

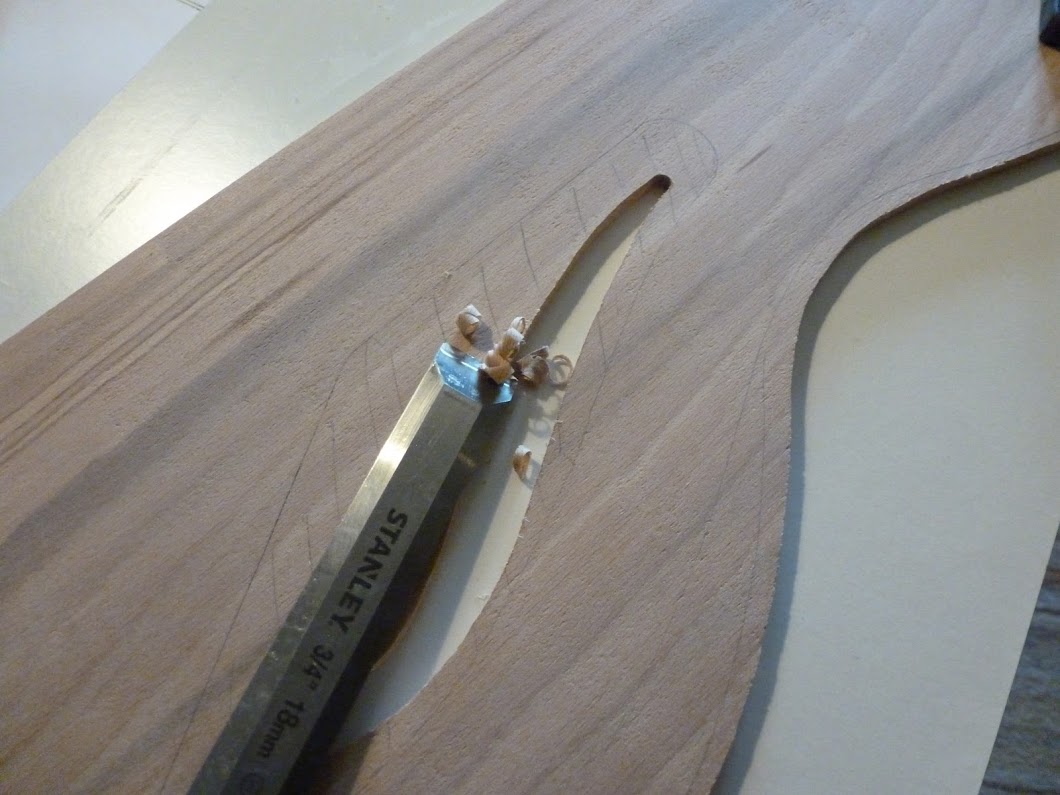
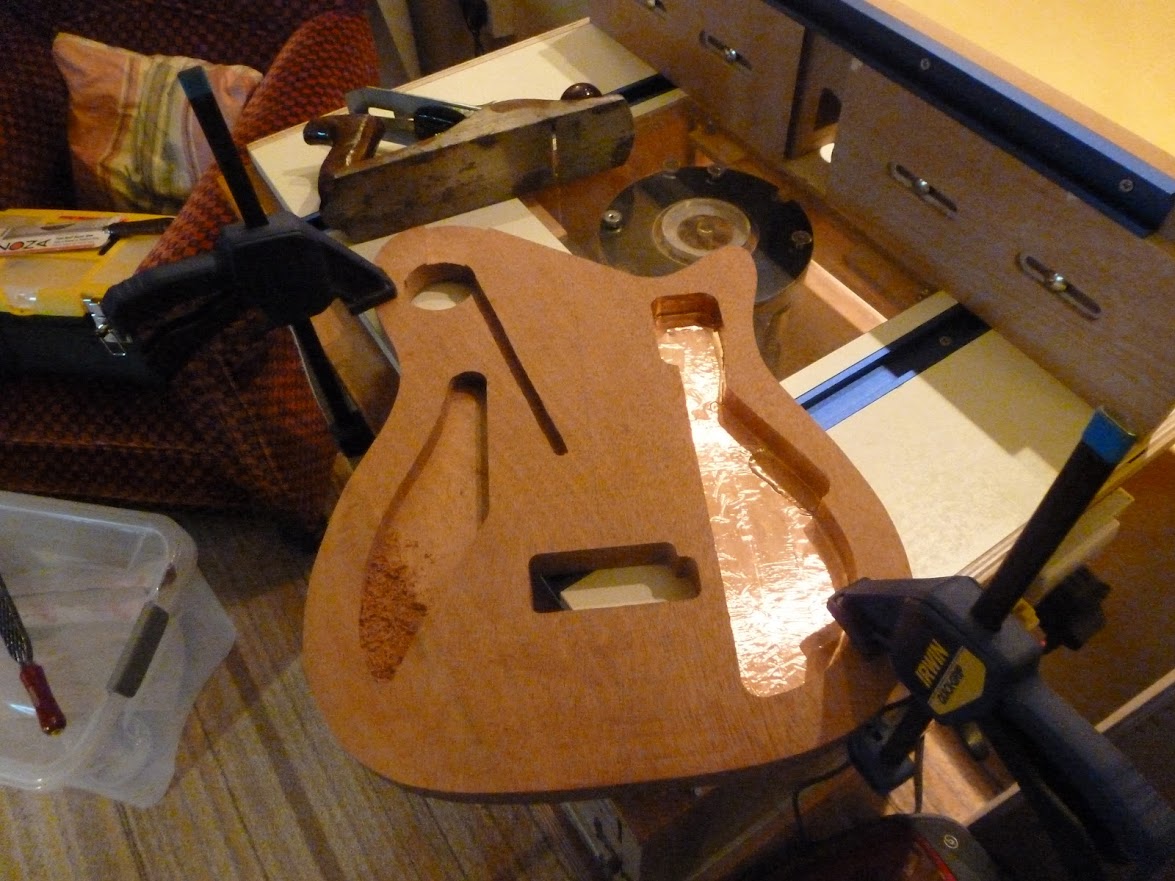
Templates and Construction
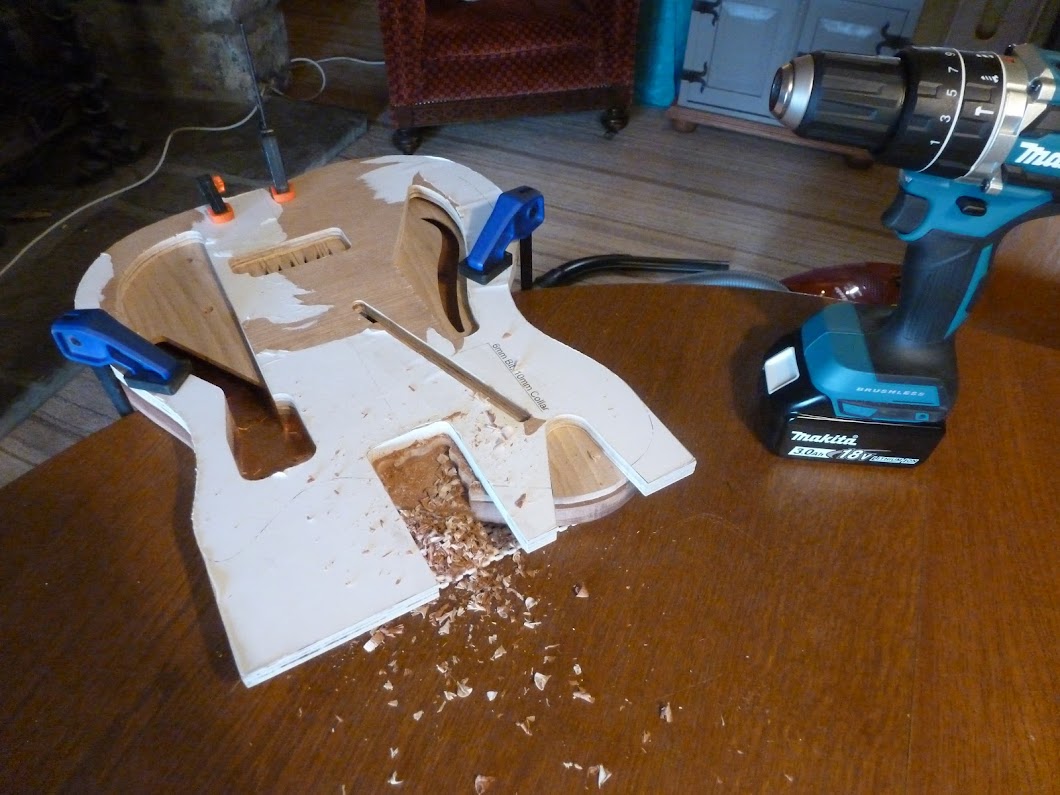
I don’t trust myself enough to make a guitar freehand yet, so I made a fairly comprehensive set of templates for this build. These templates were made by printing off 1:1 templates, and carefully bandsawing/sanding to final size. For some of the small cutouts, I’d sized the templates based on a set of guide bushings, as some of the internal radii are too small to use a bearing cutter on.

One key tip is to check the dimensions of your printouts before you make your templates. As it happens, many printers will do some slight scaling to your documents when printing, so you might need to tweak your printouts to be accurate!
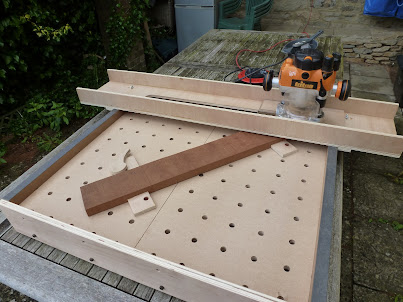
This guitar build leaned heavily on my router table build. Not only did I use it for all the template work, I also used it for squaring off all of the stock, making the neck laminations, and even bookmatching!
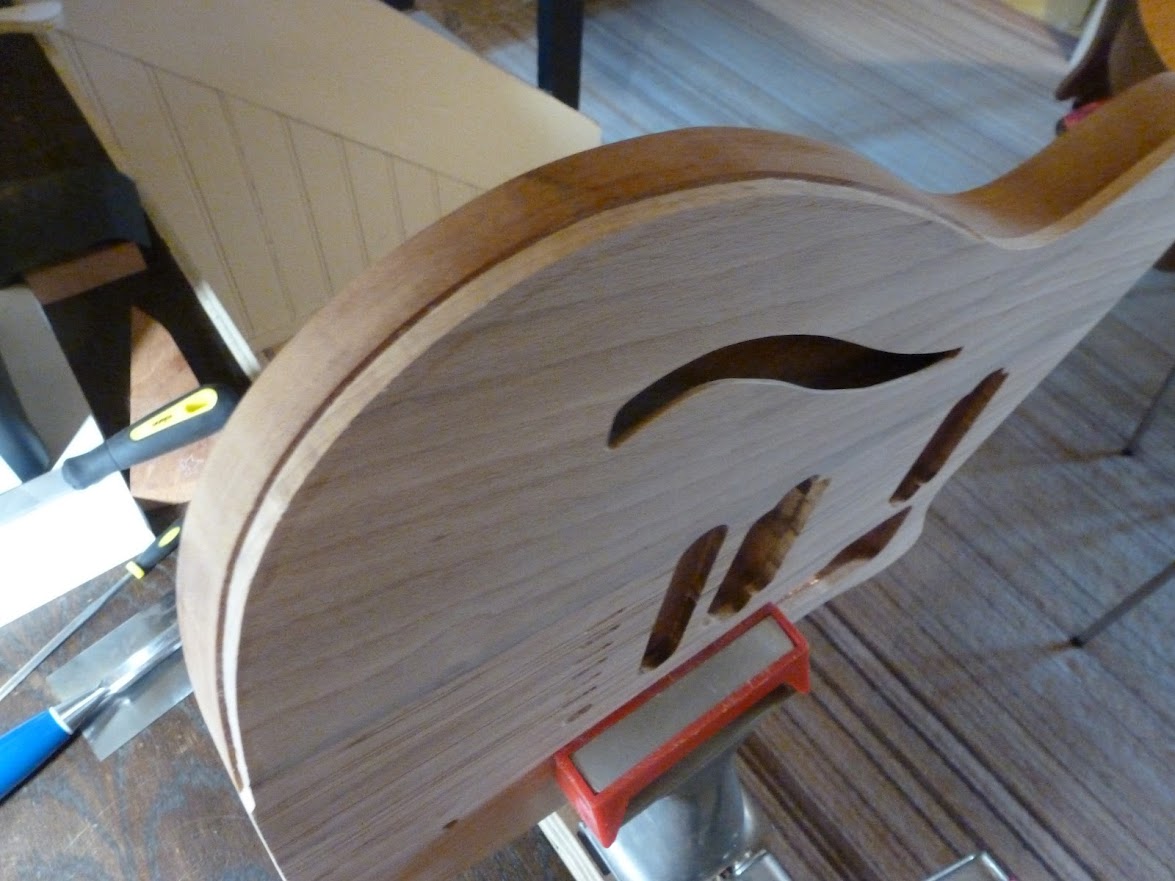
My last guitar build had a drop-top arm bevel on, and I kind of like how it looks. However, without very careful bending, you can see a cutout on the side where the bend relief was cut. To hide this on the new build, I decided to install wrap-around binding. This gave the extra challenge of routing a binding channel around the non-flat surface of the guitar body. This is where the surface follower jig comes to the rescue! The result is shown below.
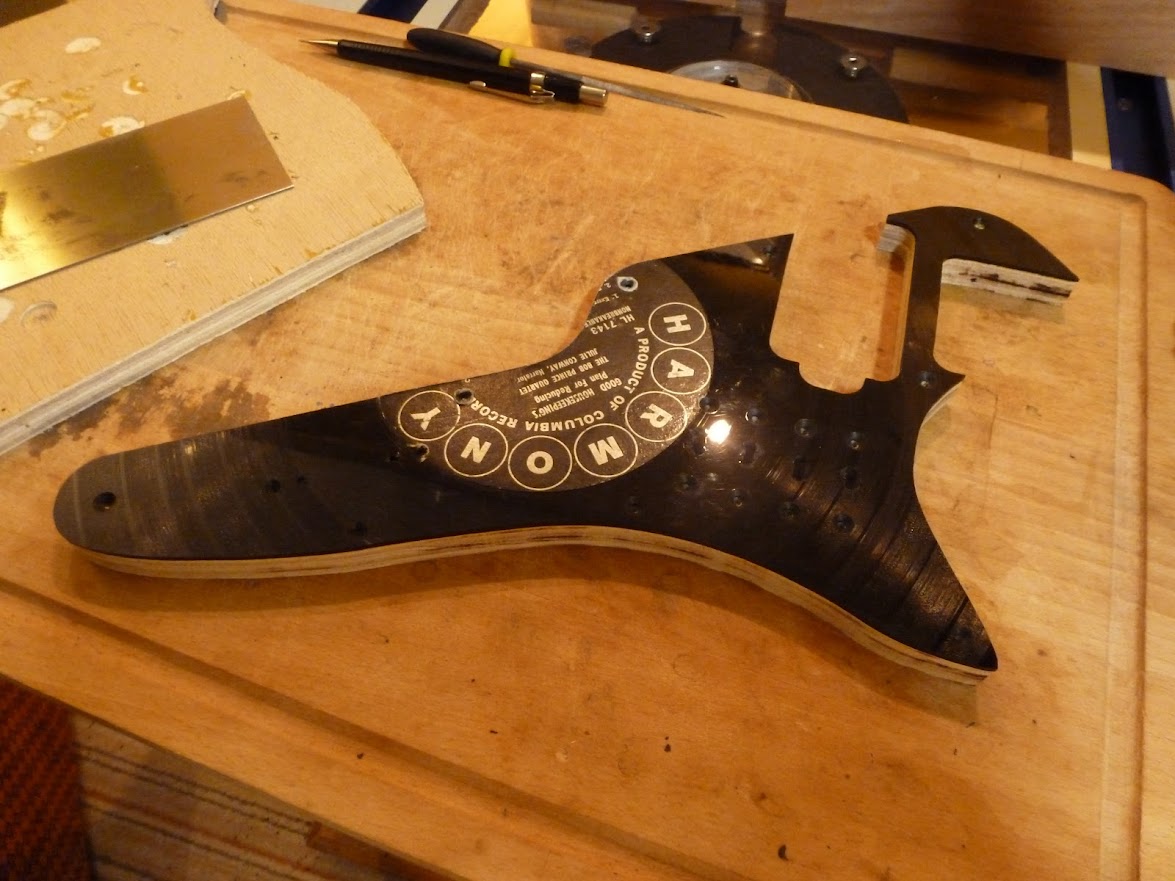
I can’t emphasise how useful a router table is for making professional looking things! For the scratchplate I decided to use an old vinyl record, and from past experience, trying to cut these with a saw tends to shatter the vinyl. No such issue for the router table!
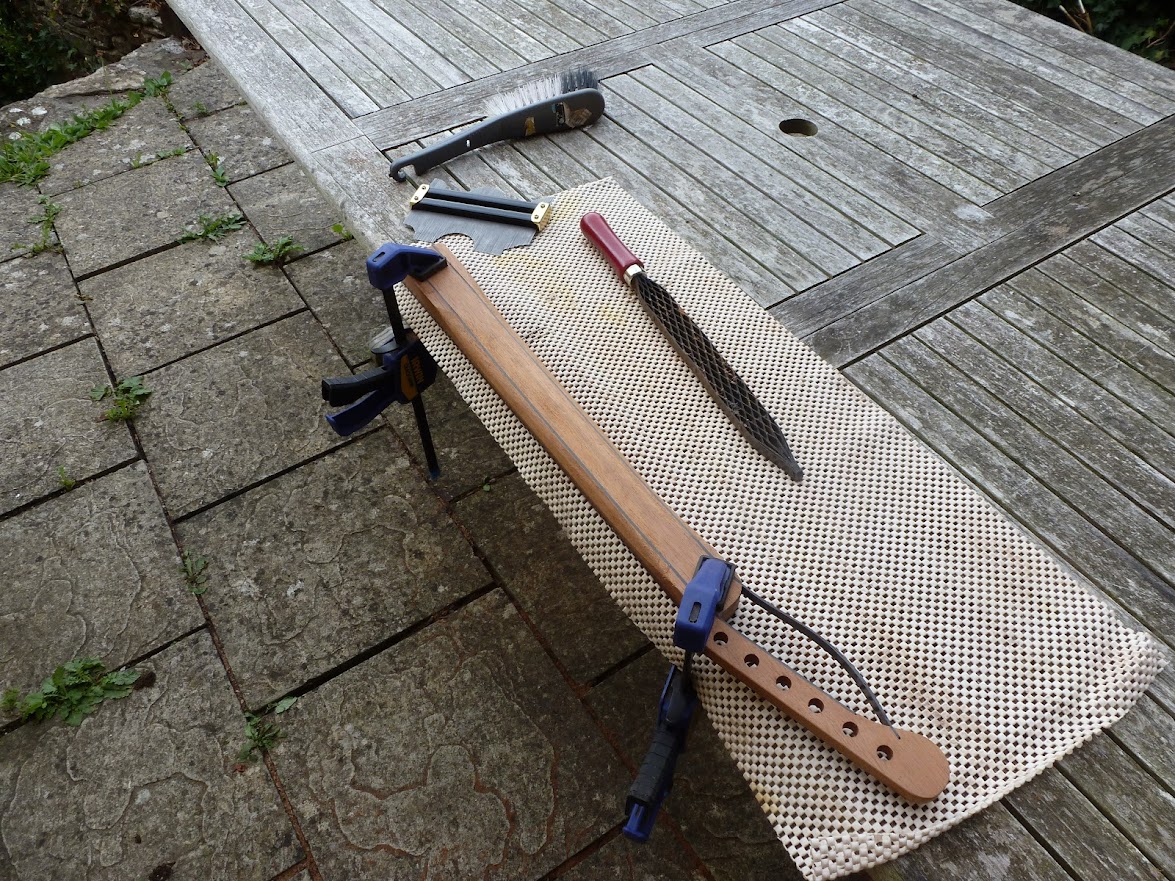
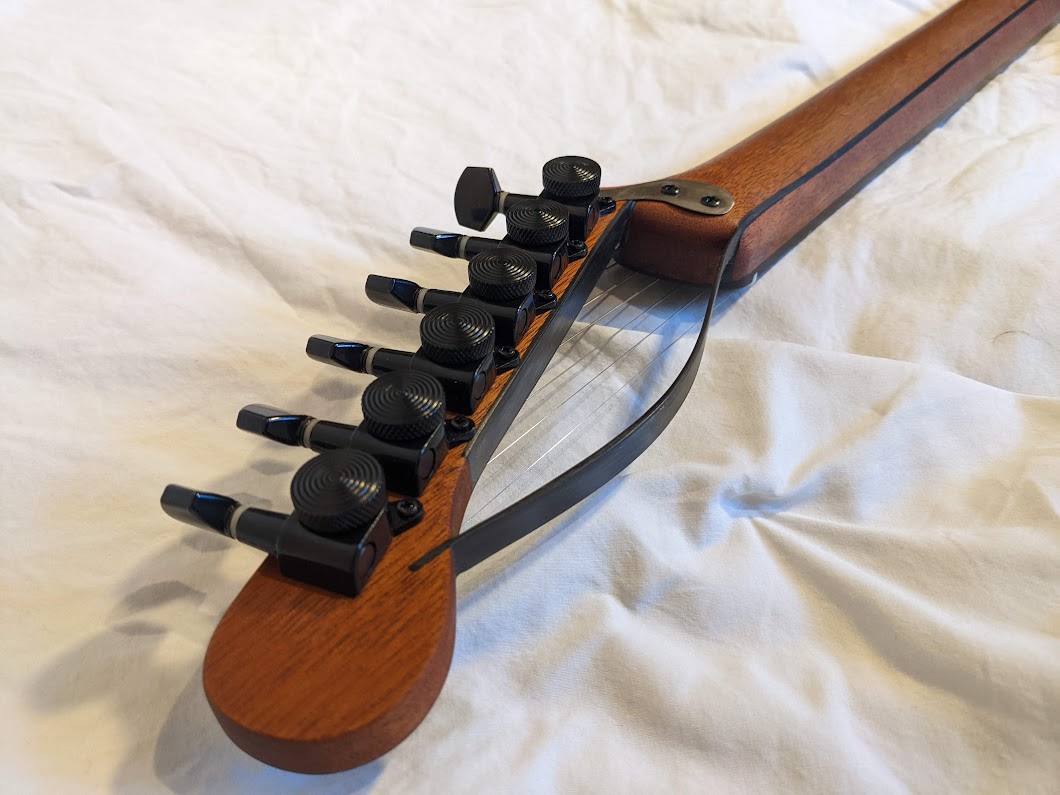
The most unique feature of this guitar is the neck construction. To get the skeleton headstock and a super-thin neck joint, I needed to add non-wood reinforcement to the neck (on top of the standard truss-rod). In the last build, I routed channels and added steel inserts. However, this was plagued with problems, so I was determined to come up with a better design.
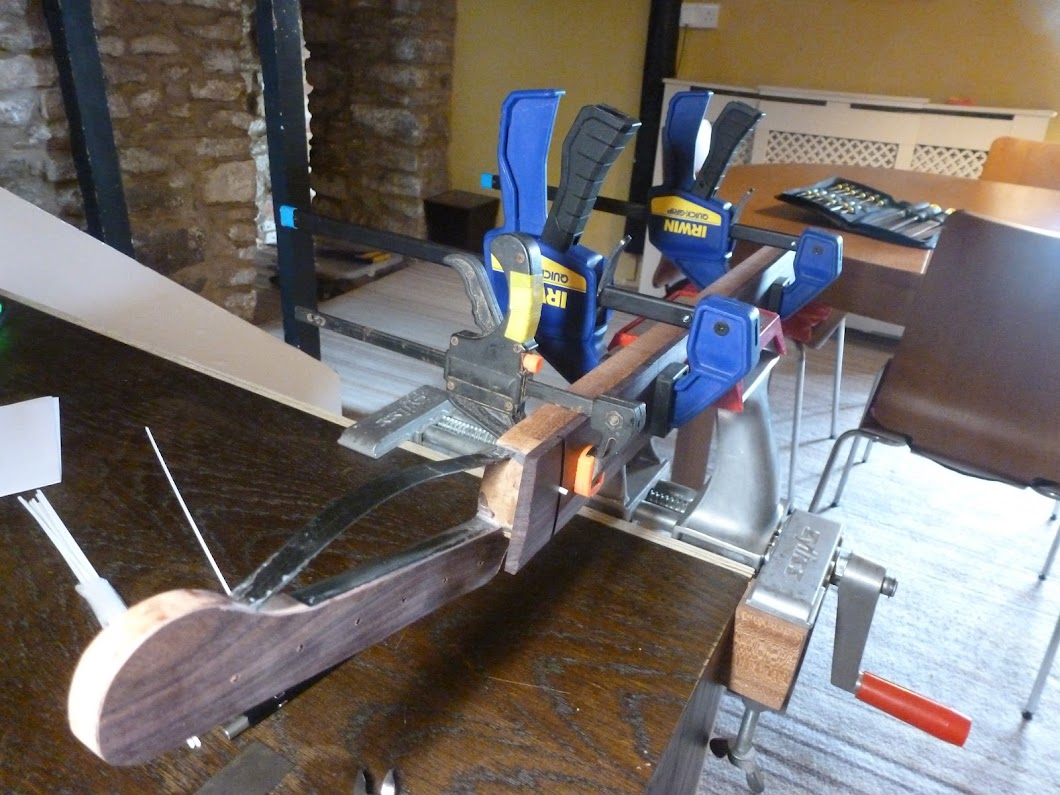
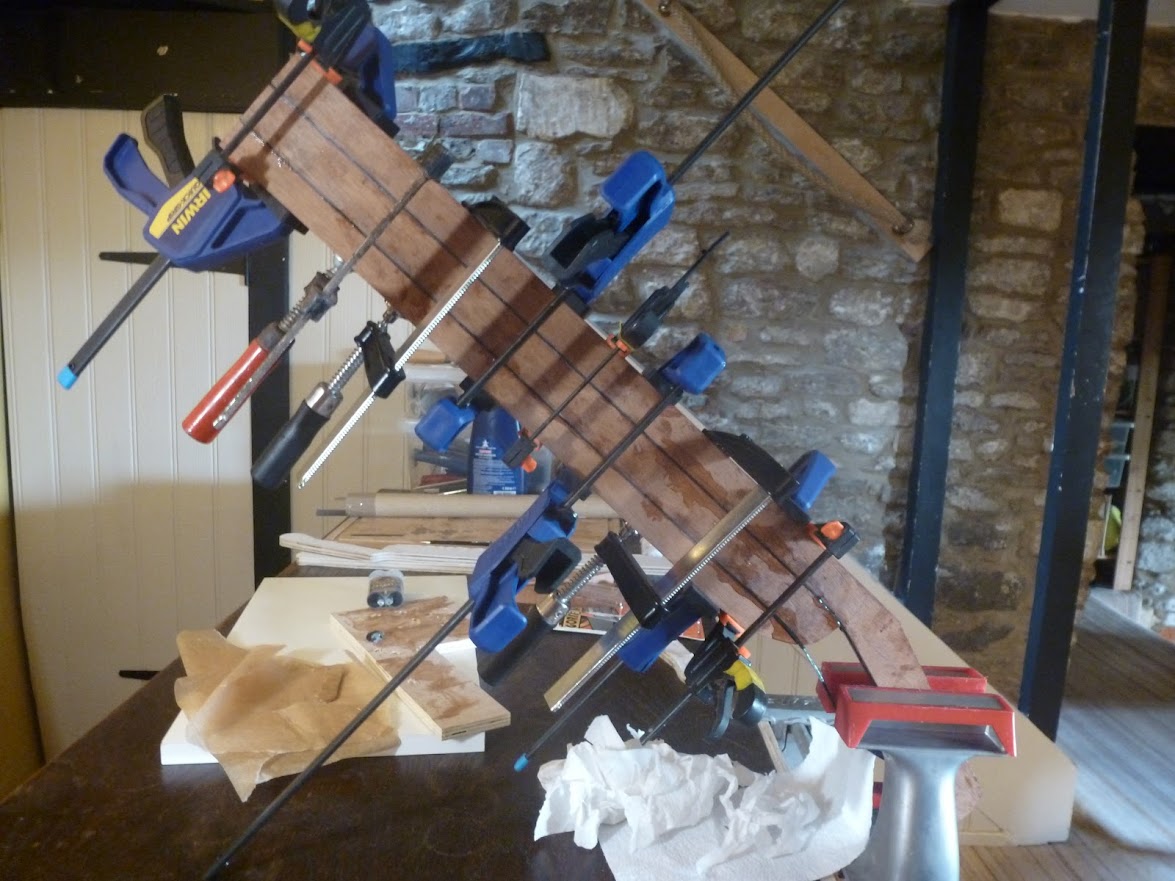
The approach I settled on was to used pultruded carbon fibre. It’s lightweight bar section which is often used in hobby drones and UAVs. To create the strong curves, I laminated strips of carbon fibre between mahogany blanks, then set all the joints in epoxy! This was possible the most stressful part of the build, as I had to get the entire glue-up done in the 20 minutes I had before the epoxy cured!
This approach turned out to be incredibly stiff against the force exerted by the strings, however the one oversight I failed to spot was the torsion caused by the offset headstock design. This tried to pull the laminations perpendicular to the glue joint, which caused tuning instability issues. I fixed this by adding a small metal plate across the back of the headstock.
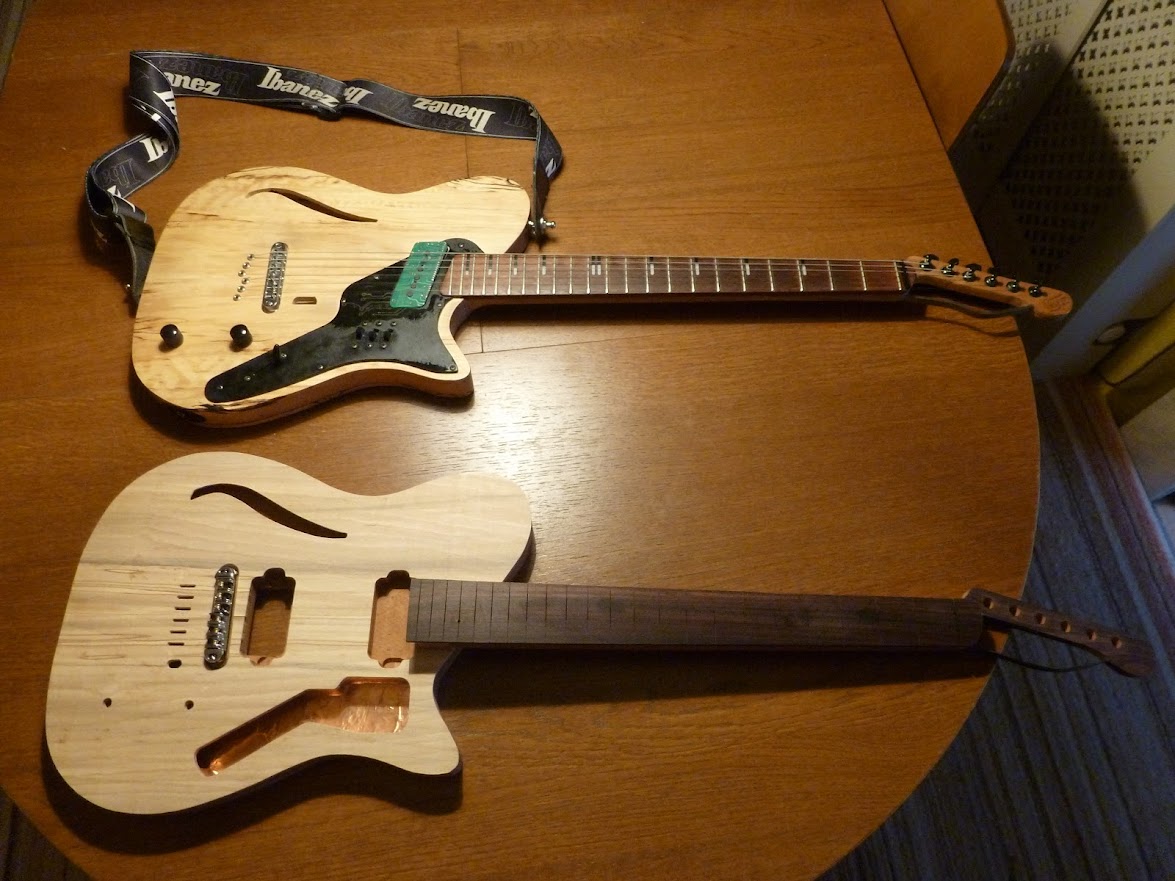
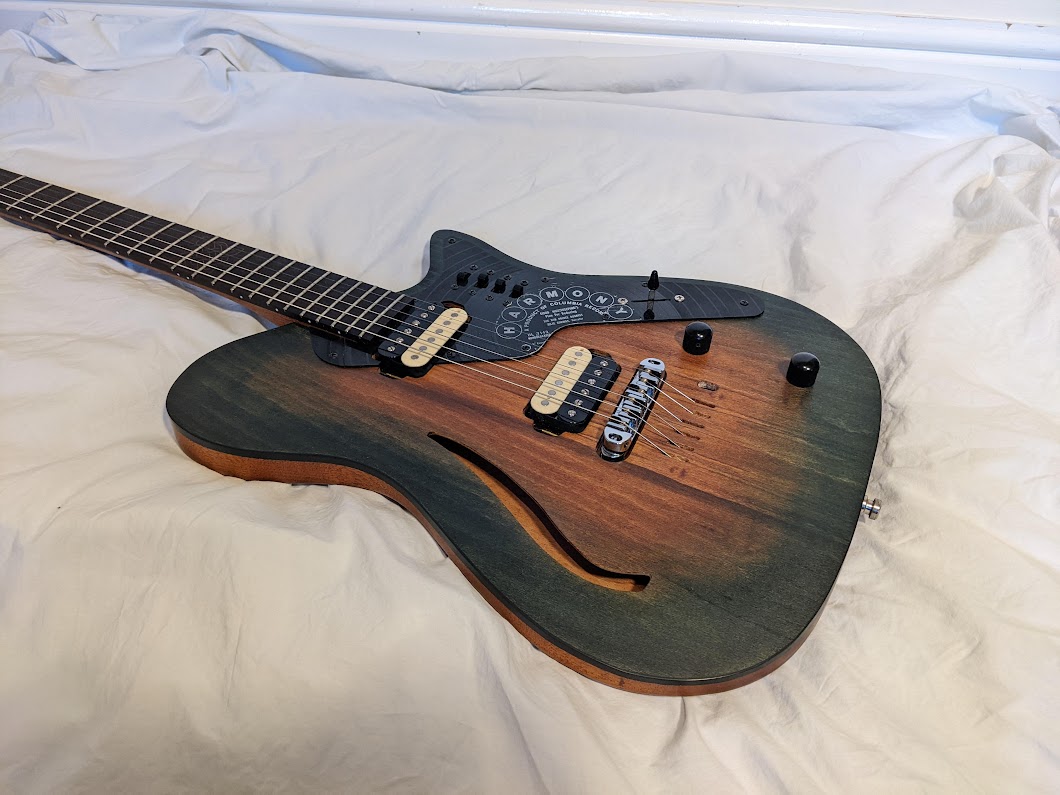
Below is a picture of the new build next to my old guitar. The design language is definitely the same, but I think the new one looks much sleeker!
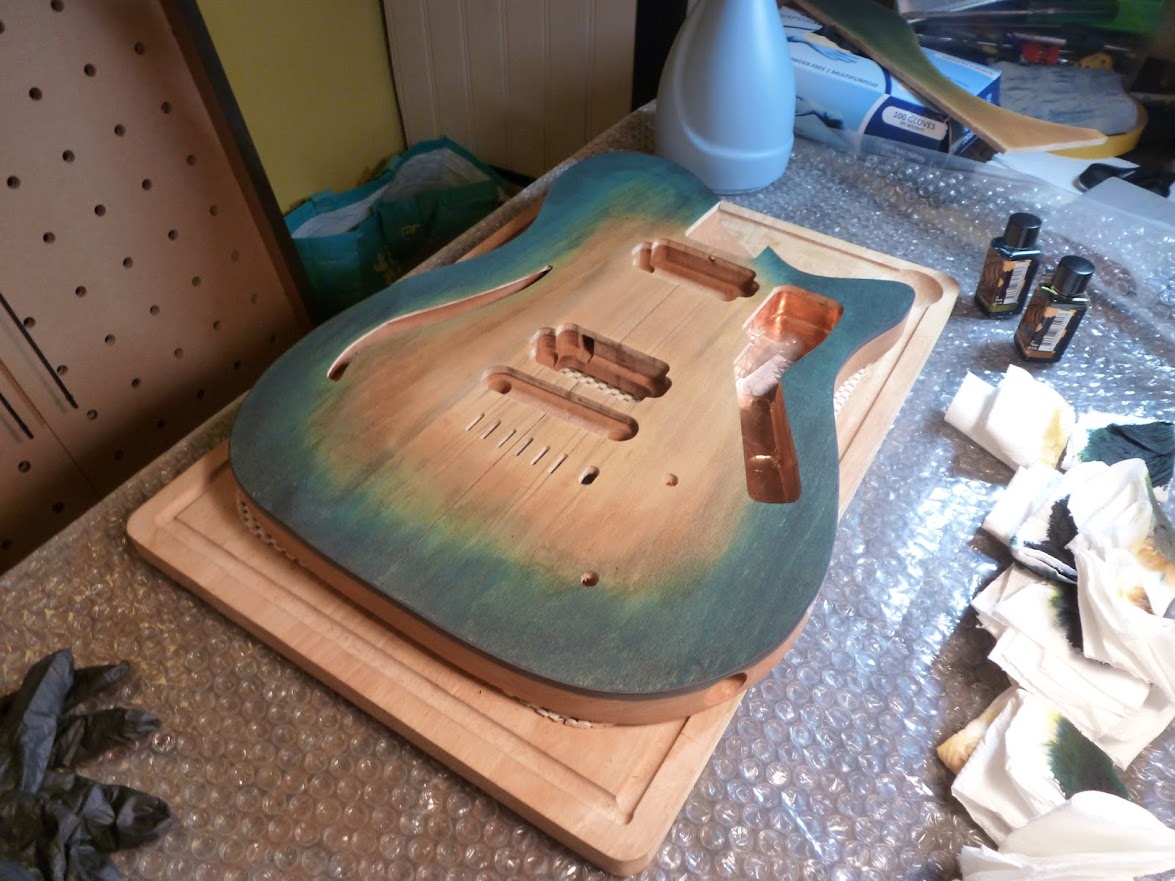
I wanted to try a non-natural wood finish for this build, however I’ve had bad experience with spray-painting in the past, so wanted to try a dye-based finish, then finish off with Tung oil. In the end I just used standard fountain pen ink, and the results were actually surprisingly good. You can get a very good finish considering how cheap the dye is. The one thing to watch out for is superglue stains… while they are invisible in plain wood, they will wreck your stain finish.
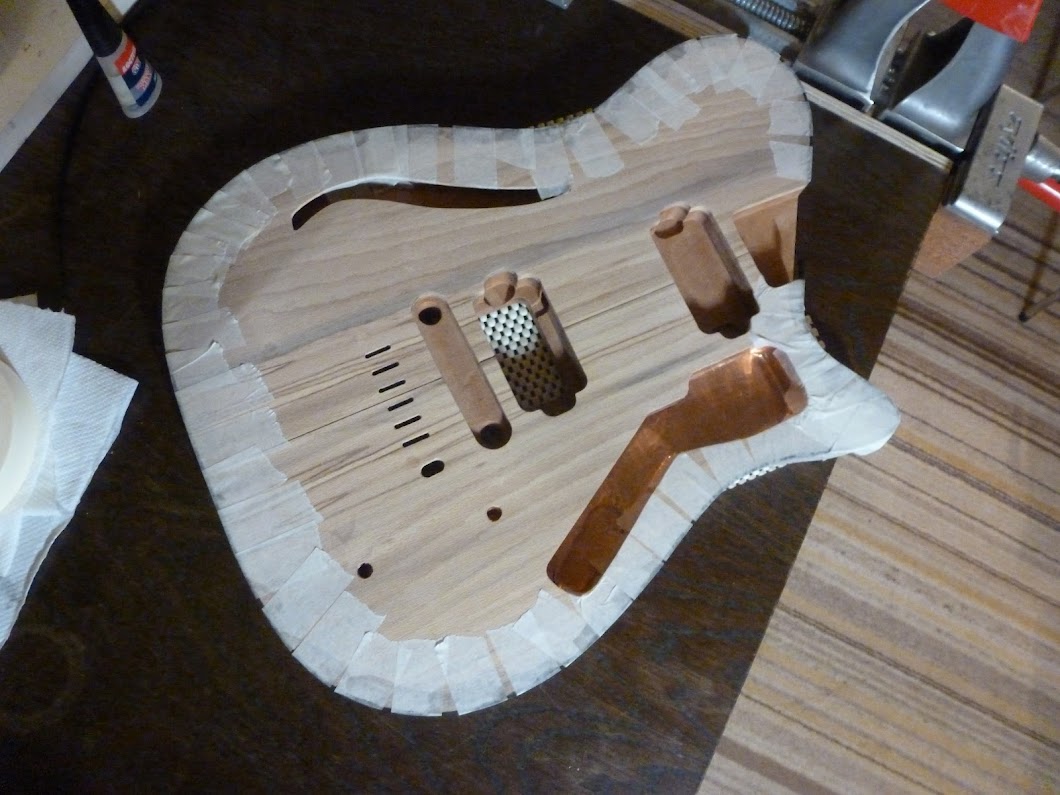
Wire Inlay
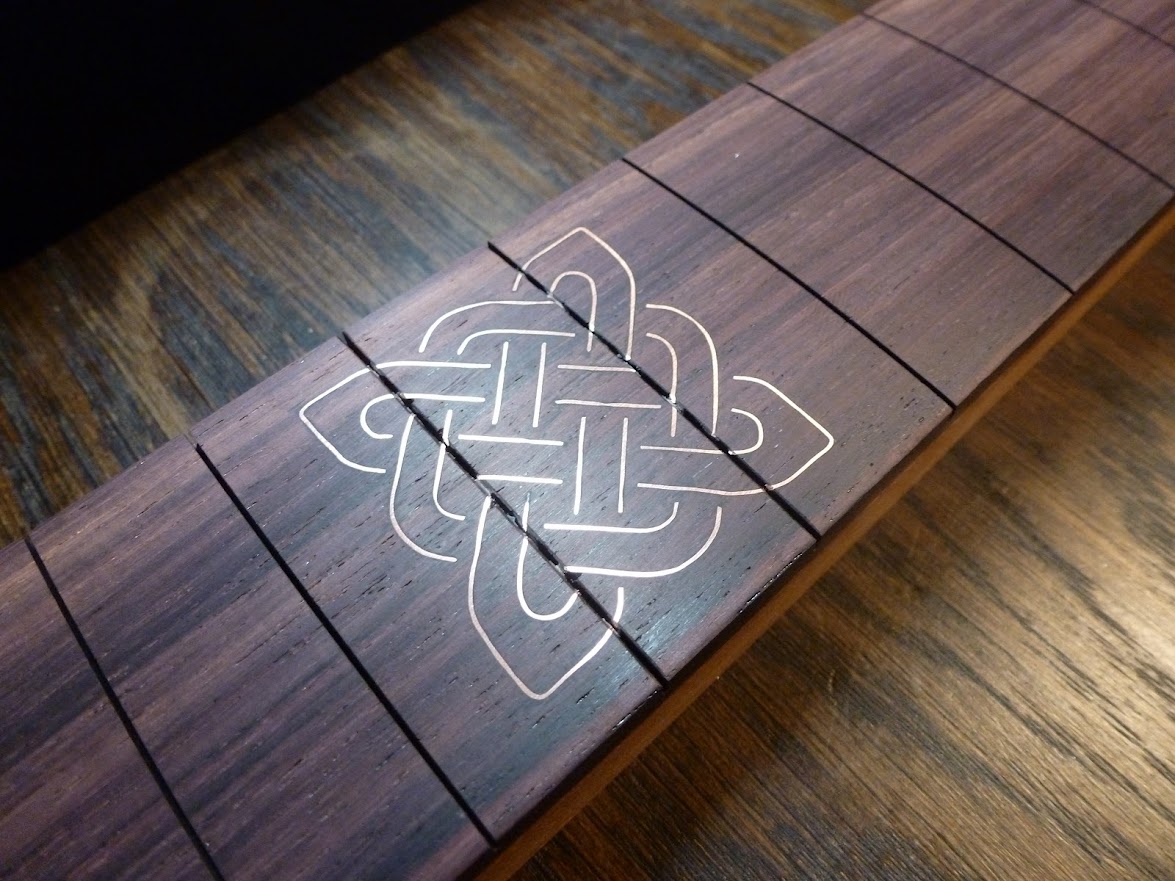
I wanted to try something fun for the inlays, but I do not trust myself enough with a dremel to try any solid inlays just yet. instead I opted for a technique inspired by this video, using copper wire and a scalpel. It seemed slightly lower risk, and it’s quite subtle, so you don’t notice any imperfections from a distance!
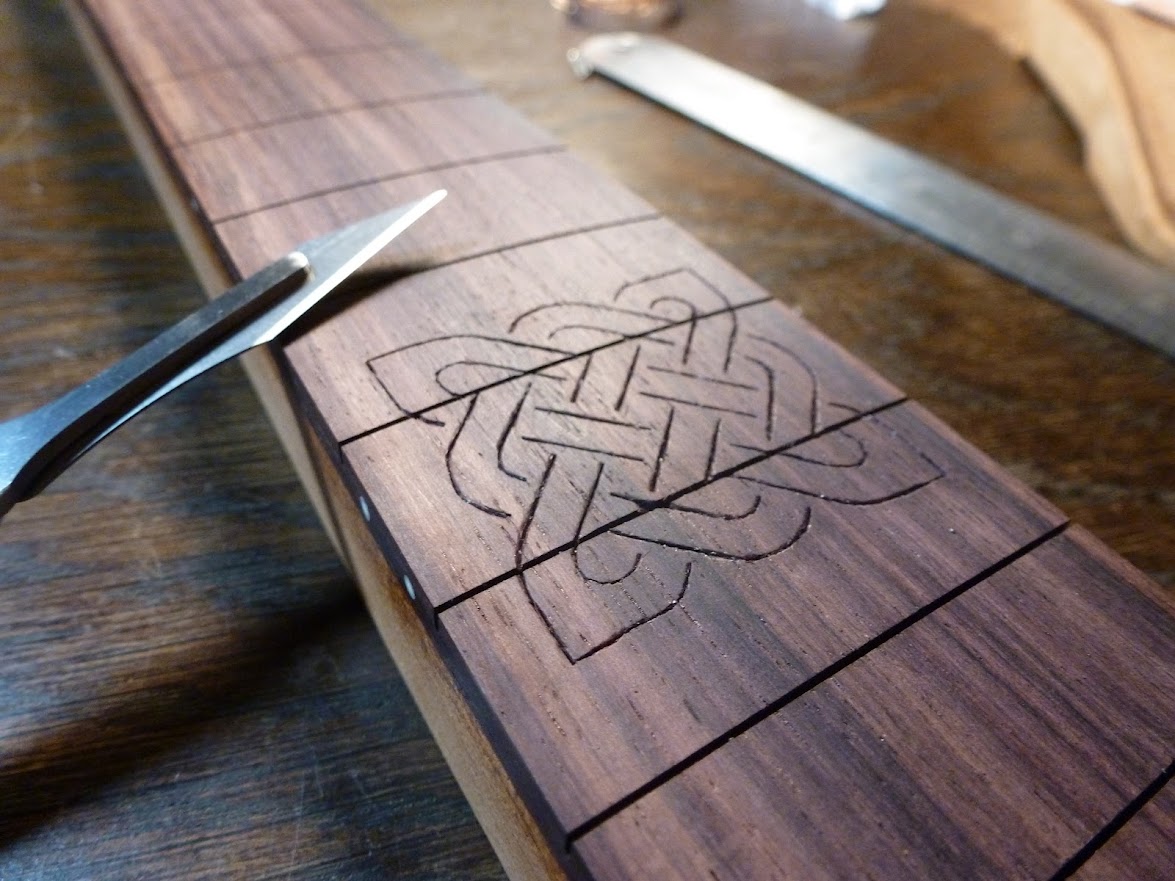
The result came out quite nice, however if I were to do it again, I would find some proper box-section wire. I just used circular wire that I had on hand, however you have to be very careful about how far you inlay it, in order to keep the lines constant width when you level the fretboard.
Custom Bridge Design
When designing this guitar, I was listening to a lot of country and western music, and I have always had a love for pedal-steel music. There is a neat tool called a ‘B-Bender’ built into some guitars which allows you to change the pitch of your B-string by pulling the strap button.
I wanted to install a B-Bender & tremolo bar system for my guitar, however my main gripe with commercial B-Benders and tremolo systems is that they are both massive and ugly. This bridge design aimed to fix that by having all of the workings concealed under the wooden top, with minimal cutouts on the rear of the guitar.
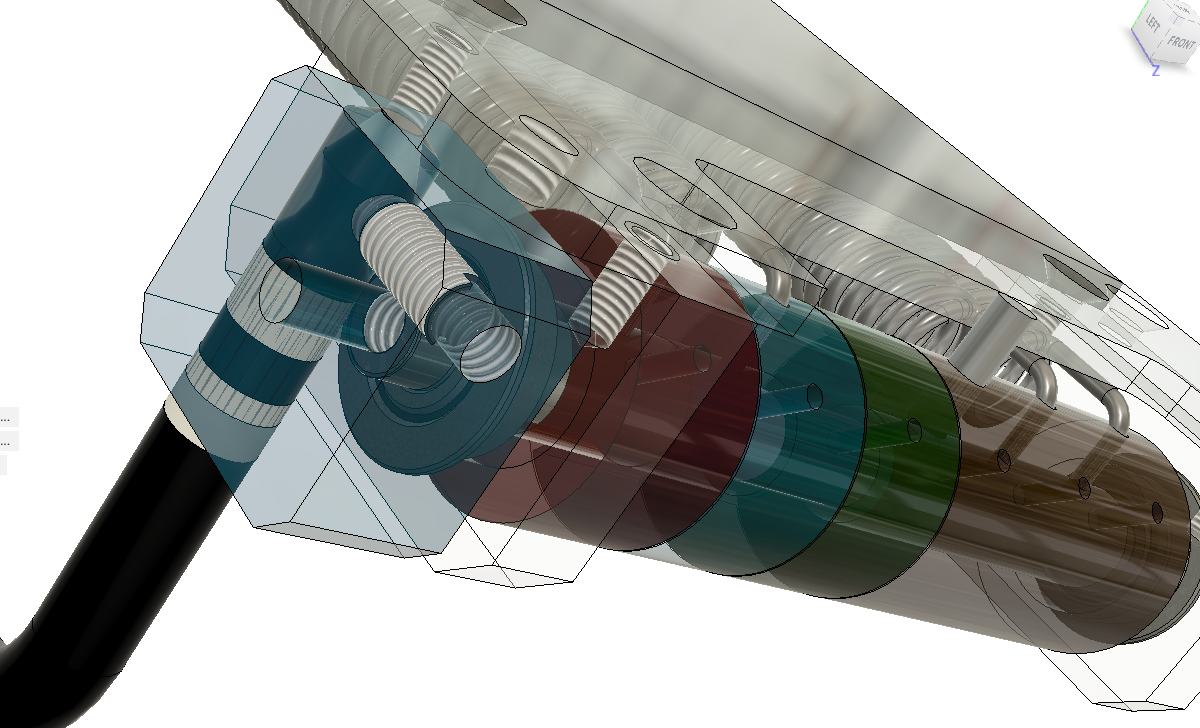
The CAD for the bridge is embedded below:
I should caveat here that this design doesn’t actually work on my guitar, as using it causes tuning stability issues. However, entertain me by allowing me to walk through the design…
The system is designed to have the following functions:
On pulling the strap, the B-string should raise 1 tone.
On lowering the tremolo bar, all the strings should lower in tone.
On raising the tremolo bar, only the G-string should raise 1 tone.
This comes with a few challenges. The first one is that the tremolo bar should have not be ‘floating’. I rarely need to bend the strings up while playing, and this configuration is much more stable for tuning. However the string block can’t have a hard end-stop, else you wouldn’t be able to bend the G-string up.
Moreover, you can’t permanently tie the B-string to the strap pin, as using the tremolo bar wouldn’t lower the B-string without moving your strap pin. So some means of disengaging the strap pin linkage is needed.
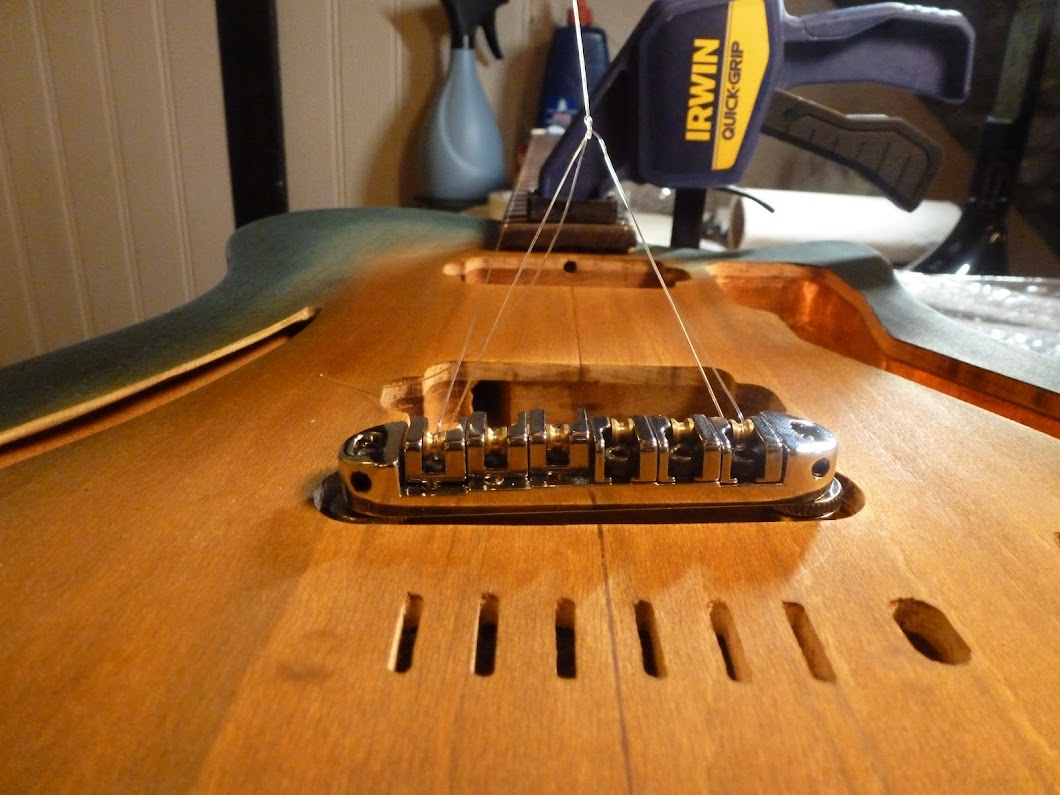
The result of these constraints was a neat system of tumblers running on bronze bushings that would allow the tremolo bar to move the strings somewhat independent. Have a look at the CAD above if you are curious as to how this works…
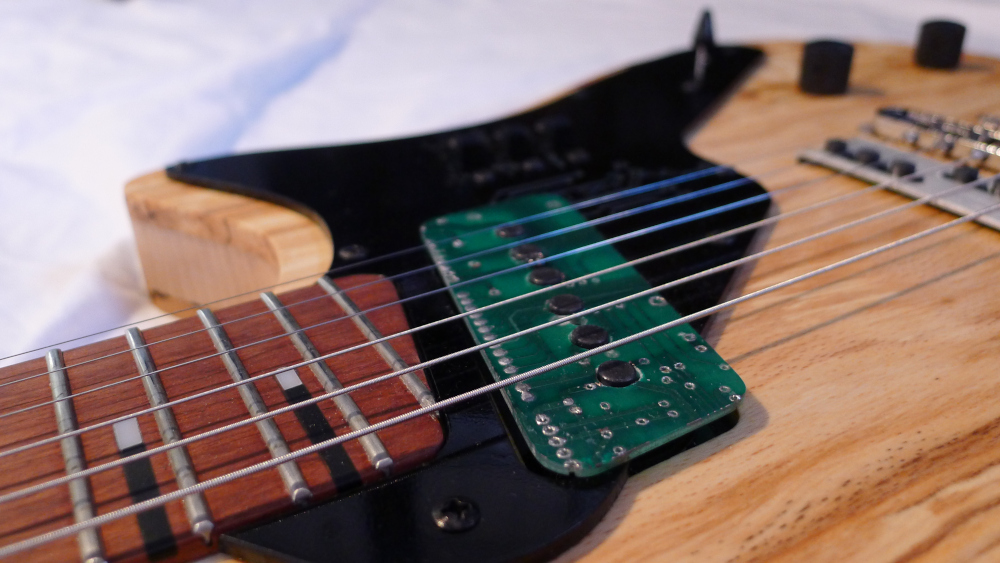
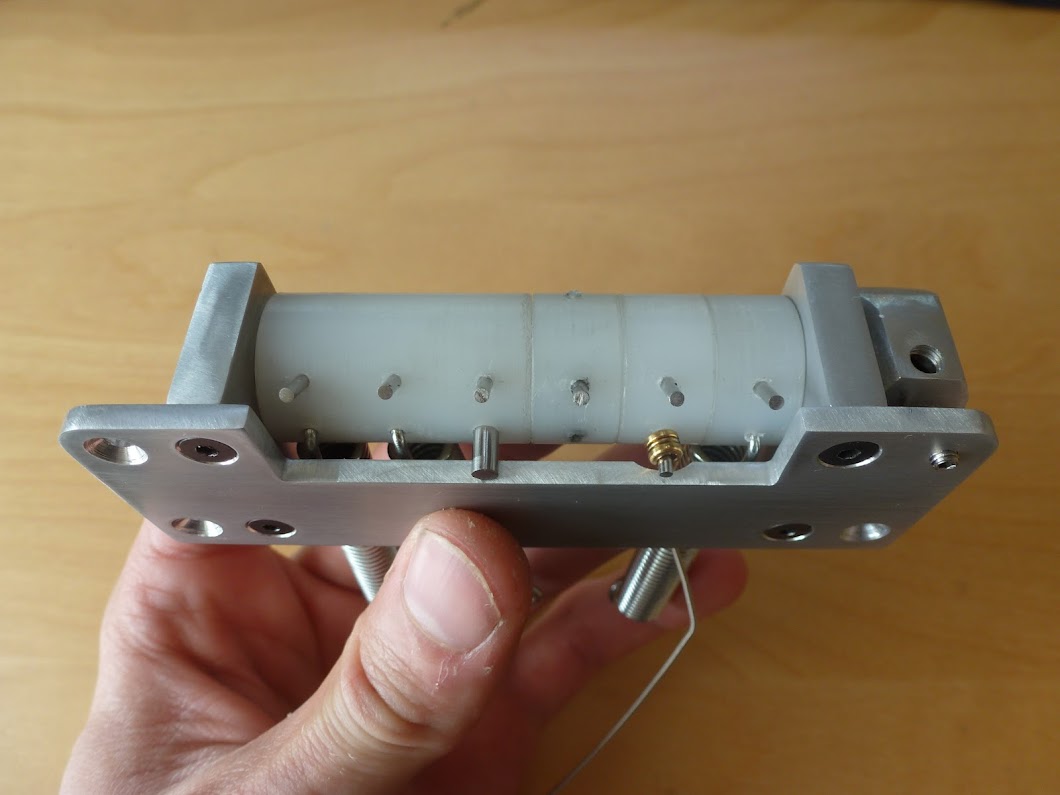
I don’t have a mill or lathe at home, so the first prototype of this system was made using sheet metal and a variety of 3D printed jigs. However, a friend nicely helped me turn and ream the nylon bushings to size.
This block mounts and controls the strings, however a separate assembly was needed to bend the strap pin. Most B-benders have a solid linkage an a large cutout on the back of the guitar, however I wanted to try and replace this with a Bowden cable linkage. The unit that bends this is shown below. Note how the strap pin is in a slot with two ball detents. This allows me to ‘lock off’ the B-bender when not in use, then ‘pop’ it out to use it.
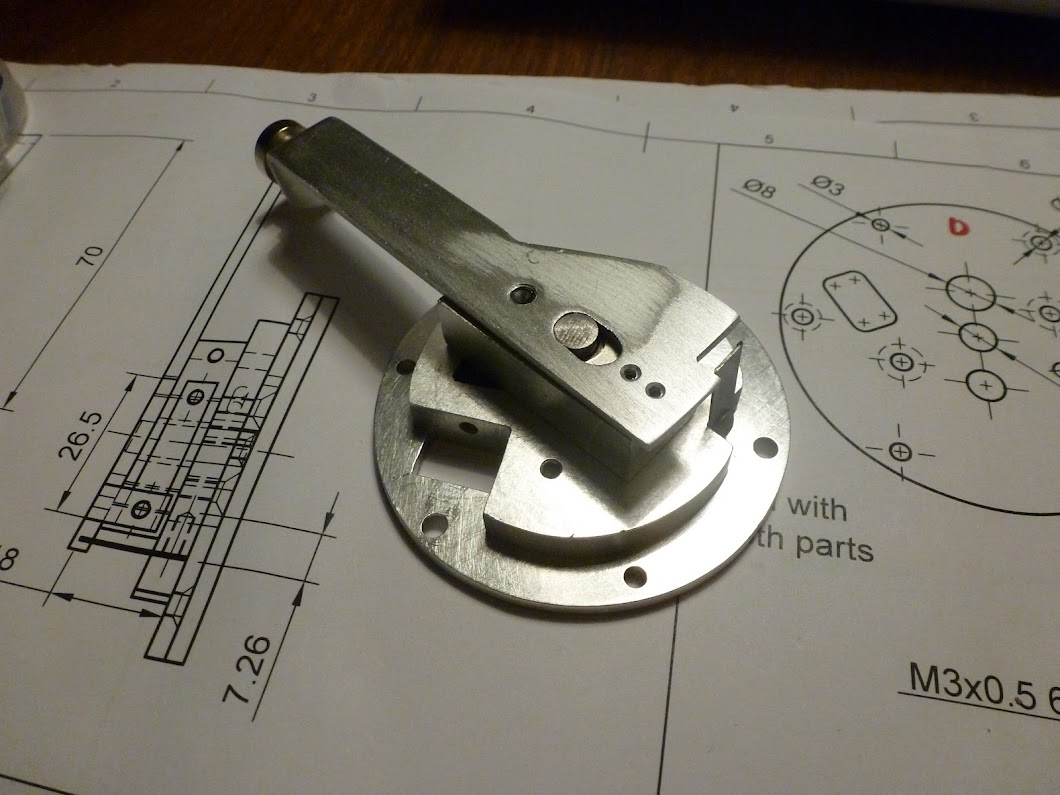
This system does work nicely in theory, however as always, the problems start coming in the integration. It turns out I hadn’t left quite enough space for the claw springs, so the strings wouldn’t always return to pitch. Moreover, the nylon parts would develop a small amount of slop between the pins after time. Really I need to re-make all of the tumblers out of steel.
Gallery
This guitar was great fun to build, and probably the first guitar I’ve owned where I don’t have any major gripes with it (other than the lack of a working B-Bender!). Suffice to say I think it will be my last guitar build for quite a while!
I’ll leave you with a few more photos of the build that I didn’t get a chance to talk about!