DIY Router Table
17-04-2021
This project and the accompanying router sled are part of the gearing up for the next guitar build. There are plenty of router table designs on the internet, so this article isn’t intended as a how-to. This is more of a reflection on some of the design decisions I made, as well as some things that I would do differently next time.
The first thing I should point out is that I didn’t build the entire enclosure - the base bit of furniture is actually an old chest/bedside unit picked up from a local jumble sale. It was missing a drawer when I bought it, and when having a look round it caught my eye as ideal for being able to quickly access the router without having to cut a large hole in the front of the table. As I’m still using the living room as my workshop, keeping the router table looking as much like furniture as possible helps appease my housemates!
The rest of the build is mostly done with scraps I had lying about - compared to something like a DIY tablesaw, router tables are much more forgiving with poor tolerances. Really the only two things you need is a dead-flat top surface and a perfectly flat/square fence. Unlike with other projects, I decided not to do any CAD for this one, and just wing it with the bits of stock that I had on hand!
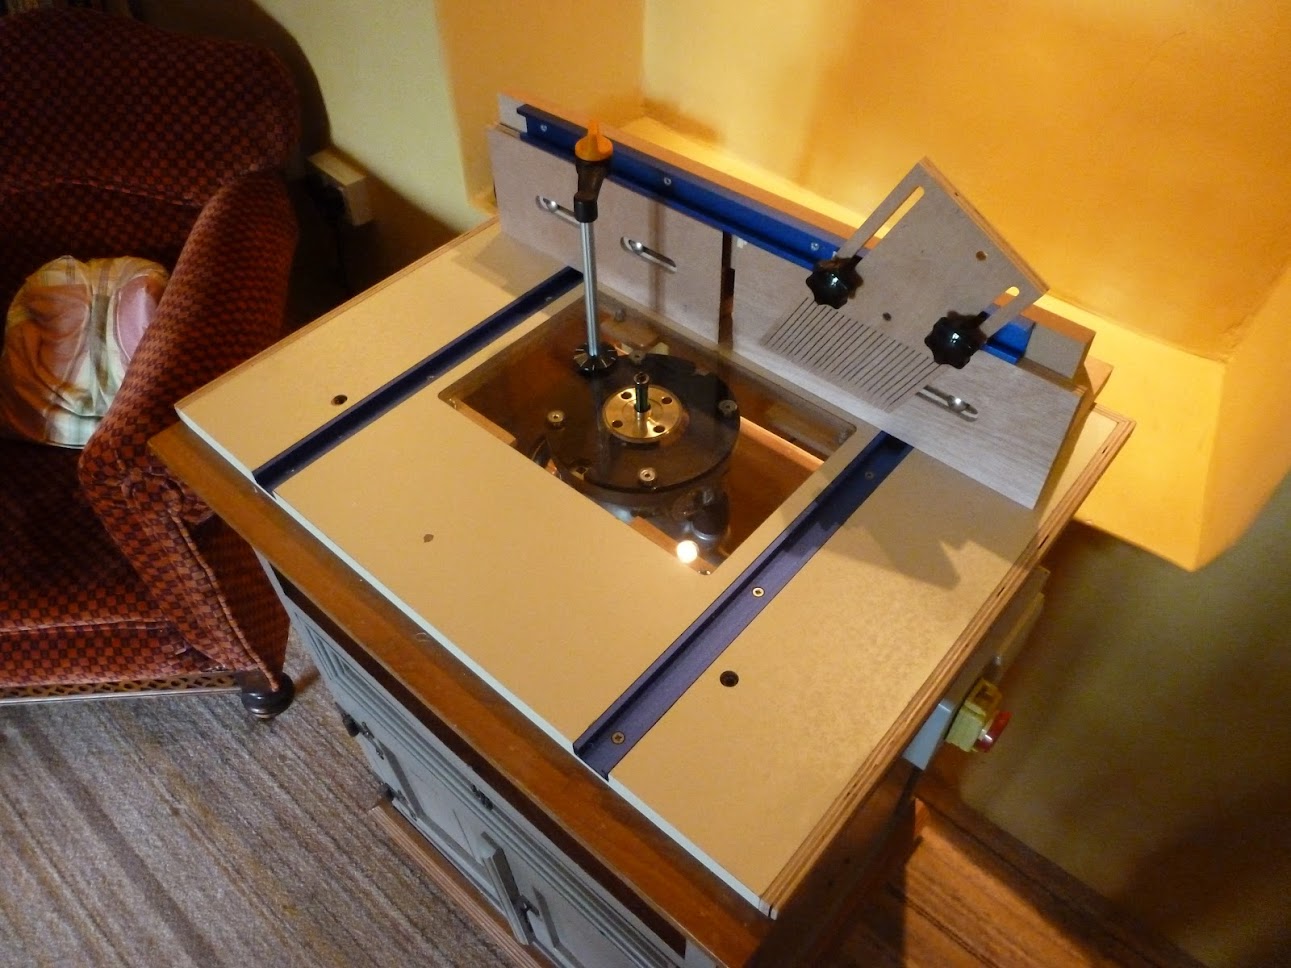
The table is based on a Triton MOF001 - for the price, you really can’t beat it if you want a router that you can use both free-hand and in a table. It has a top-adjustable height screw, auto spindle lock when the bit is raised and an integrated rack and pinion for quick height adjustments.
The one thing it doesn’t have is a good system for mounting guide bushings: there do seem to be bushings designed for the Triton routers, but they are hard to find and very expensive. For the kind of projects I do, guide bushings are a must, so I ordered a set of router bushings from eBay and designed my router table to fit them.
If you are building a router table and only have one primary router, having the router permanently attached to a removable table section is a massive time-saver. Unbolting the router from the table every time you want to route something freehand is a massive pain, so being able to lift the router out of the table and immediately use it in handheld mode is really nice. I originally made the base out of melamine, but unfortunately within the first week the melamine base had an unfortunate collision with the floor and smashed. The new version is made of acrylic, which is a massive improvement, as I can have a nice large stable base, but still be able to see my work when routing freehand. This base plate is also sized to fit my router sled.
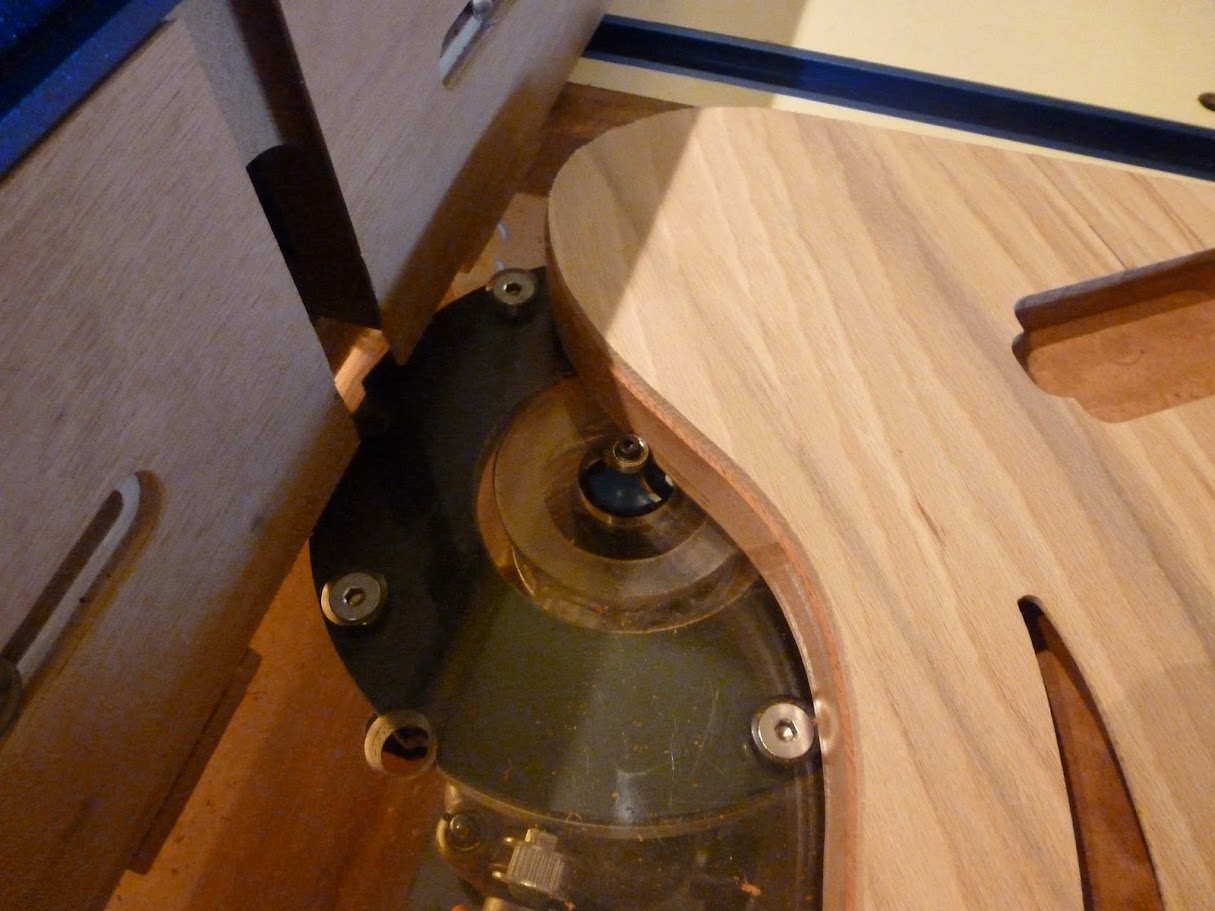
When building the router insert plate, I had two unexpected challenges. The first was that the router attaches using imperial threads, so I had to source confusing odd-ball fastenings just for this project (sorry to anyone in the US viewing this page!). The second was that I chose to mount the router with countersunk bolts. This helped keep the base plate thin, but turned out to be really annoying in conjunction with the guide bushings.
Normally, guide bushings mount directly onto the router body castings, so locating tolerance is set at the factory. In my case, I routed a pocket to fit both my own inserts and the guide bushes, then positioned the router as best I could on the centre of this routed pocket and drilled the mounting holes. Unfortunately, when I then went to mount the router, the cutter and guide bush were not concentric with each other by about 0.5mm. This might not sound like a lot, but it is really noticeable when using offset templates. If you are building something similar and want to use guide bushes, do yourself a favour and use counterbored holes and cap-head bolts to mount the router. This means that once the router is mounted you can tweak the concentricity of the cutter and bushing, whereas countersunk bolts will always center on your screw holes.
The table top is a bit of melamine with plywood edging. Melamine is usually pretty flat, but if buying new, it’s worth bringing a straight-edge with you to check. Note that while my melamine was very flat, the top of the jumble-sale chest of drawers certainly was not! I carefully placed shims on the table top before bolting on the melamine. The removable insert just drops into a routed slot and sits on grub-screws that can be used to dial the router to be perfectly perpendicular to the table. On the first insert plate I had the grub screws accessible from the top, but this turned out to be annoying, as the screws filled up with dust and came loose when using the base for freehand routing. The new design has the screws adjusted from underneath, but for the most part they only need to be set once, then secured in place with loctite.
Now onto the special features! This router table has two tricks up its sleeve to help me make guitars in my ill-equipped living room workshop.
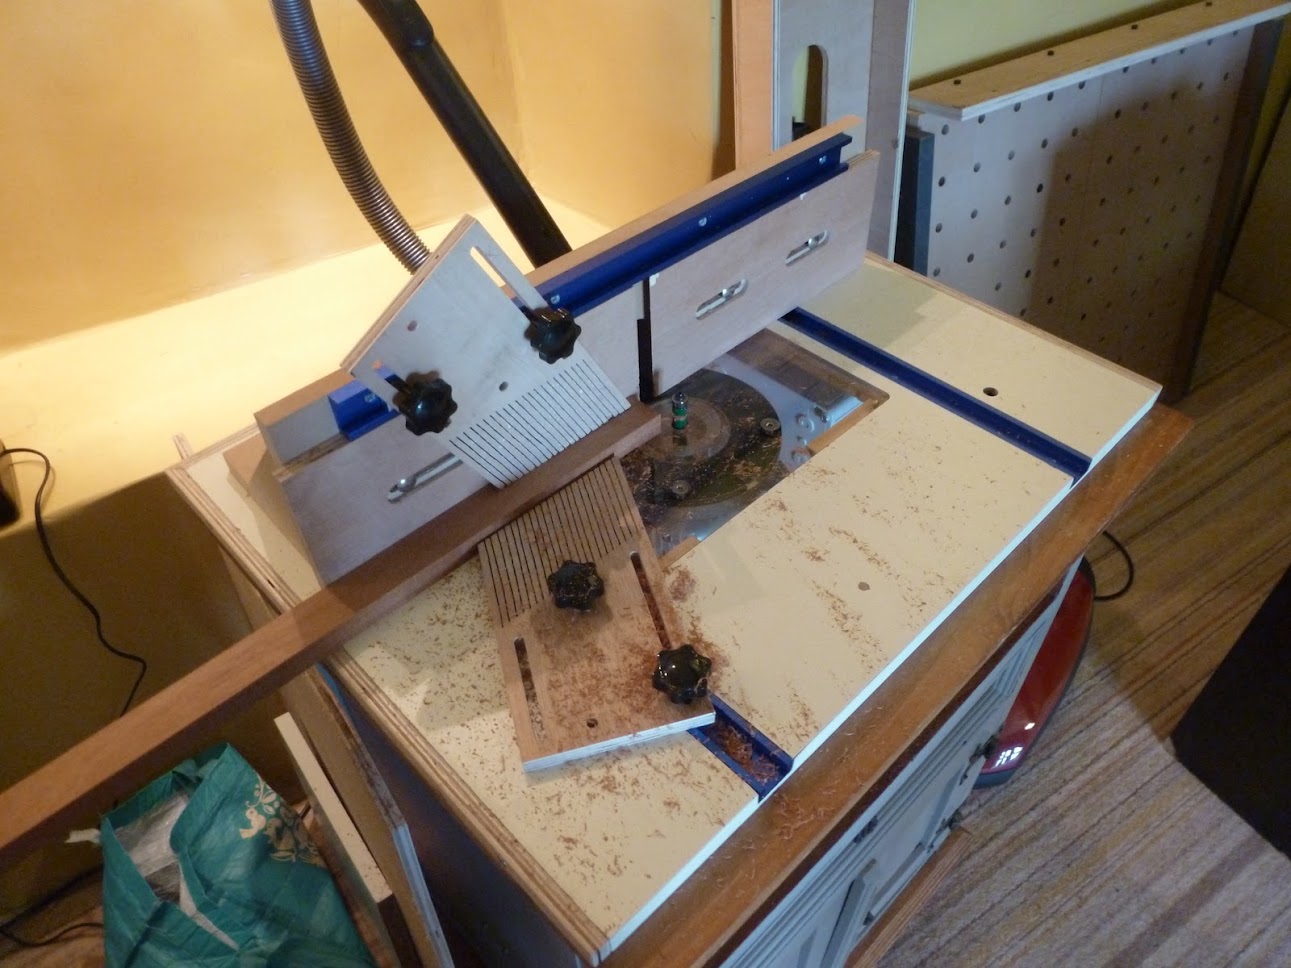
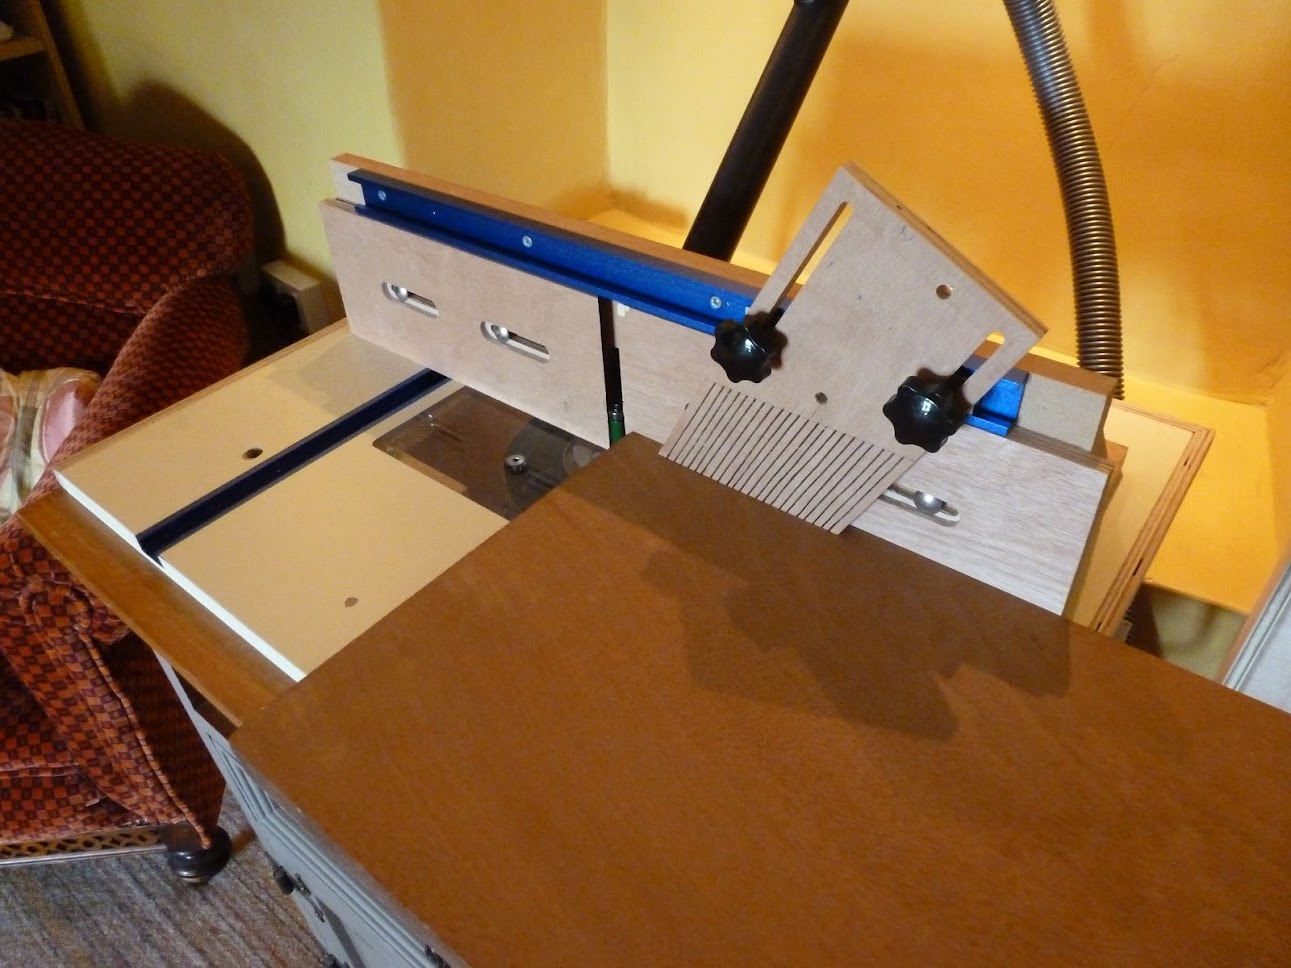
The first is the ability to adjust/shim the two halves of the router table fence separately. This allows the router table to be used as a reasonably good edge jointer (see photo above). I don’t have the space or justification to buy a jointer, but for doing neck laminations and bookmatch joints this setup is surprisingly decent! I have been able to successfully joint wood up to 40mm thick with this setup. The only caution is that unlike a jointer, the outfeed ‘table’ height is not fixed, so the fence needs to be positioned carefully to prevent joints from coming out bowed.
The second feature is a bit more haphazard, and it is for an operation that I only have to do once in a blue moon, so forgive the slightly dubious looking setup. The feature is a foot-operated router lift, which is enabled by the ‘free-plunge’ mode of the triton router. The reason I need this feature is for routing binding channels around guitars which have carved/contoured tops. Stewart Macdonald do sell a jig for doing this exact task, but it only mounts small flush-trim routers, and is horrendously expensive! I decided to make an upside-down version of this jig on the cheap by attaching two GT2 pulleys to the base of the Triton router and using a hanging loop of GT2 belt to raise and lower the router with my foot. This combined with a 3D-printed follower attachment for a bearing cutter allows me to cut binding channels around contours while keeping the cut perpendicular.
Below is some shaky footage of the follower jig in action - I have only used the lift for binding channels, but I imagine it could be quite useful for cutting blind mortices.
This table wasn’t that much effort to make, but it has proved itself to be unbelievably useful as a ‘jack of all trades’ tool that I can use to act as a stand-in for the various bits of woodworking equipment that I can’t justify owning!
Combined with the router sled I now have all the tools I need for turning raw lumber into musical instruments, albeit in a reasonably long-winded way. But being able to do the job of multiple tools with my router is very valuable, especially as I’m still garage-less!