Van Saga 2 - The Corrosion Strikes Back
22-09-2023
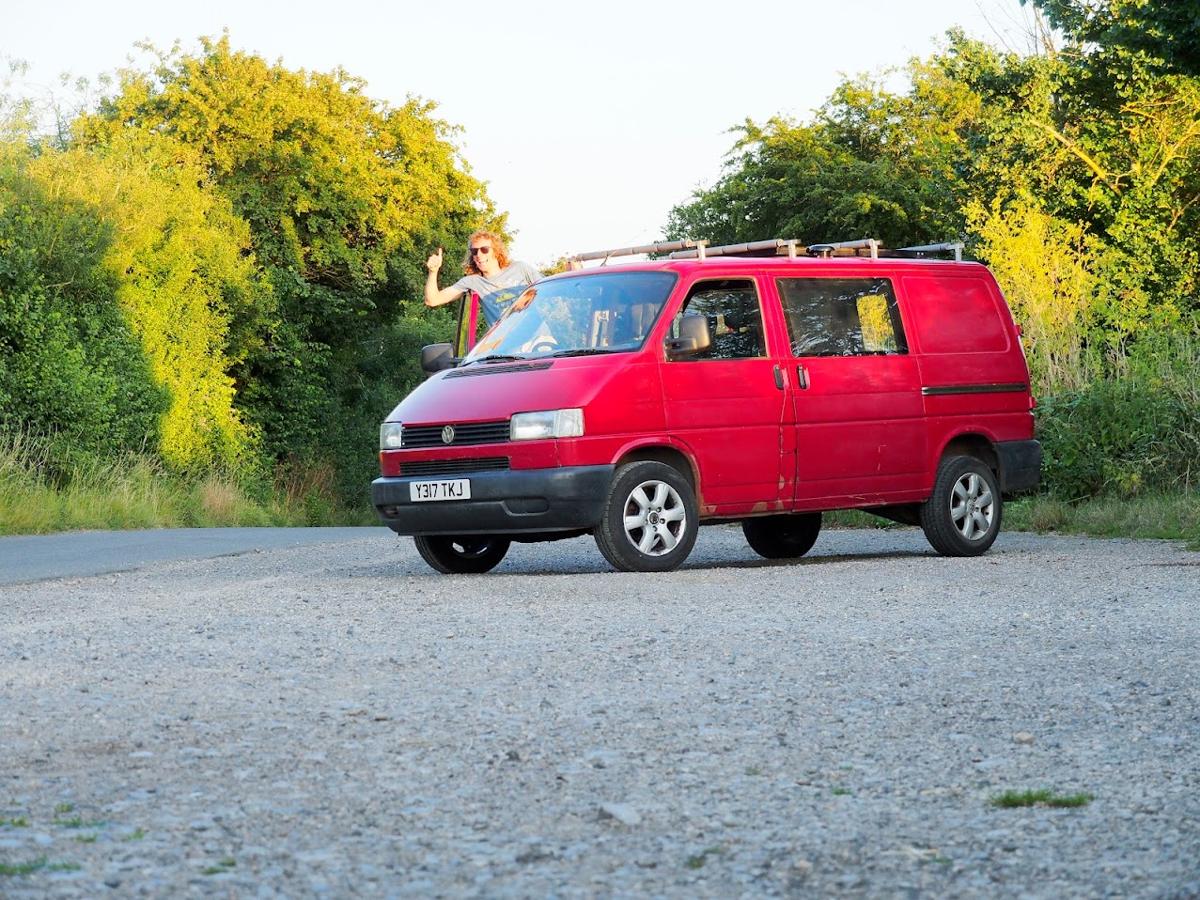
This is the second and unexpectedly final chapter in a van conversion series regrettably cut short… If you’re following on from Part 1, you’ll remember that I got to the point that I had a drivable, but empty shell of a VW T4 campervan. While it is still usable for road trips in this form, it is sorely missing furniture and the insulation required to brave British winter camping trips…
Unfortunately due to some unexpected mechanical surprises, I ended up cutting back some of my grander plans for this conversion. Nevertheless, hopefully you can enjoy coming on the repair and conversion journey with me!
While restoring the van, I spent a lot of time getting inspiration from Pinterest. The VW T4 Short Wheel-Base is an interesting half-way house in terms of size. It’s not quite big enough to stand up in, so using one for a full live-in van conversion is tricky. On the other hand, I didn’t want to kit it out purely as a weekend trip van. In addition, I kind of wanted a desk setup so I could potentially use is as an on-the go work space or repair station.
Many of the T4 designs on the internet either revolve around a rock-and-roll bed, or a fixed full-width bed design. I wasn’t particularly enamoured with either of these options. There were two things I really wanted from the layout of the van:
- A path from the front to the back of the van. This is pretty useful when parked in tight spots, or if you want to put a bike in the back of the car. This ruled out a fixed bed setup.
- An island kitchen next to the sliding door. A lot of T4 conversions put the kitchen in the corner behind the driver’s seat, opposite the sliding door. From a conversion point of view, this is very convenient, but it means that you have to cook while sitting down, plus venting of steam/smoke is harder. A friend of mine put their cooking setup in front of the sliding door of their conversion and the experience of cooking with a view and fresh air is delightful!
The design I went for in the end was a lengthways seat that pulls out to become a double bed. The seats can also lift up to act as storage space for bedding. In addition, I added a fold-down desk setup that could house a pin-board / monitor setup, while also doubling as a cupboard to store valuables in when leaving the van unattended.
A nice hardwood recessed stovetop and porcelain sink were probably not the most practical choice, but they look very pretty and I had some nice live-edge walnut slabs in my wood stock that were perfectly sized for this application.
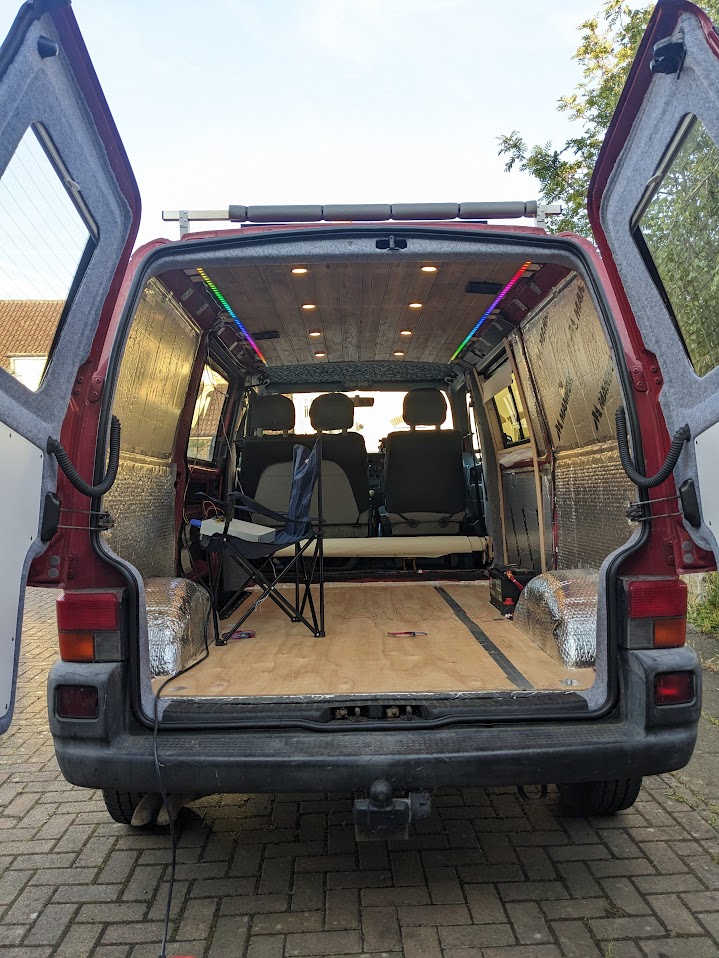
Below you can see the van interior in desk (left) and bed (right) configuration.
If your browser supports it, you should also see an interactive model of the fit-out in a T4 shell. Contact me for Fusion 360 CAD files if you are interested on doing a similar conversion design. It should fit any SWB T4 model, but bear in mind I never fully kitted out my van, so double check any dimensions before copying!

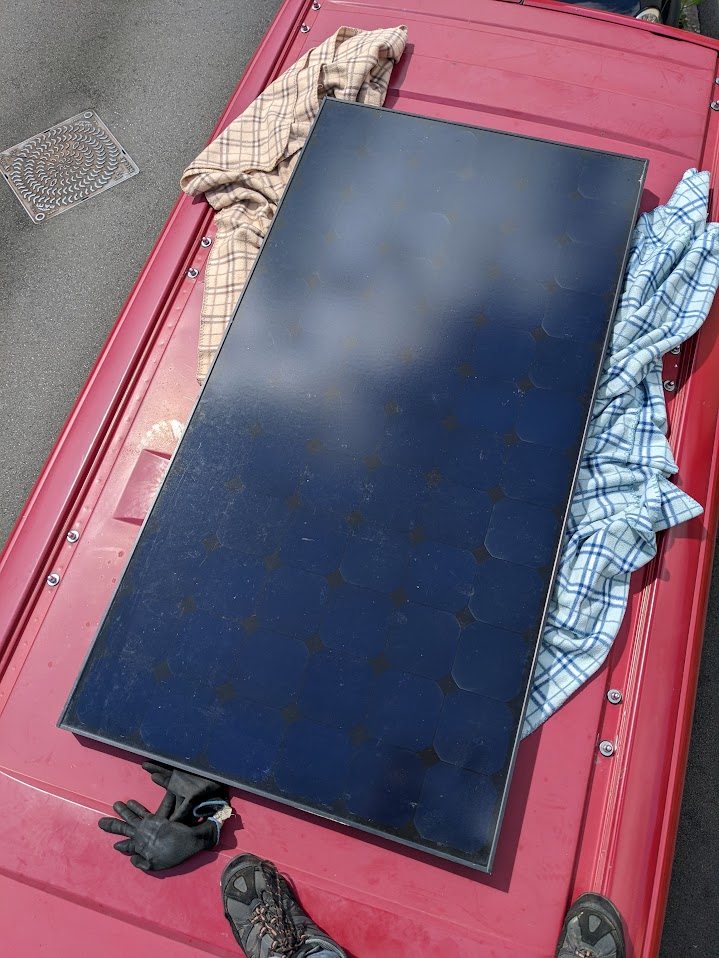
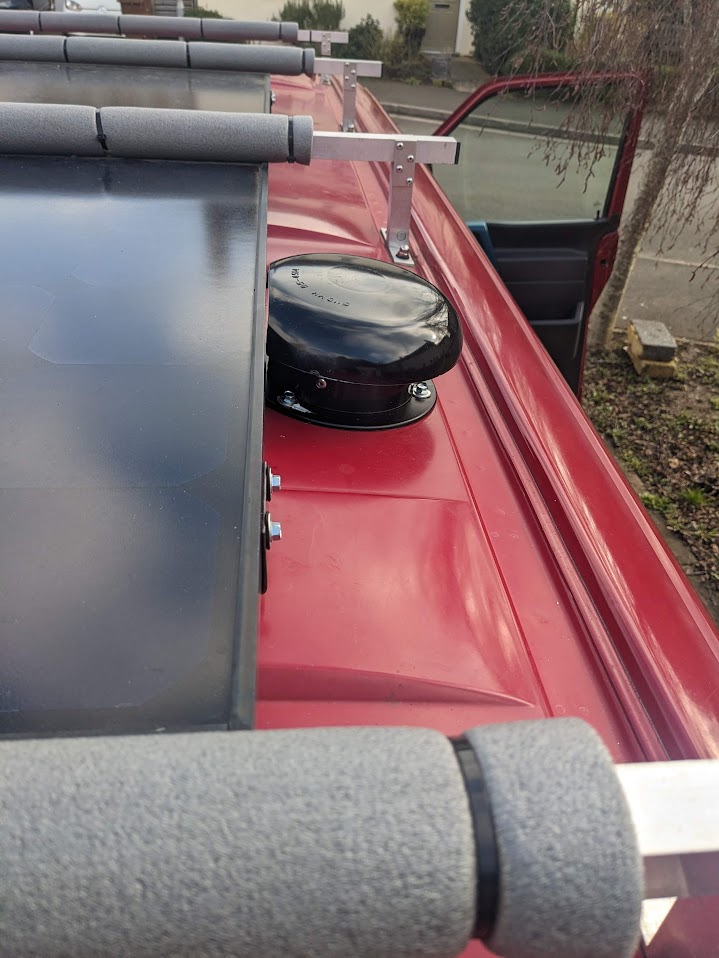
With a rough design planned out, it was time to start the conversion! Step 1 was dealing with some problems on the roof. The previous owner had drilled a load of holes in the roof for mounting a deck, and had never properly sealed them. As a result, I had to find a way of preventing further water leaks and rust spreading from these openings.
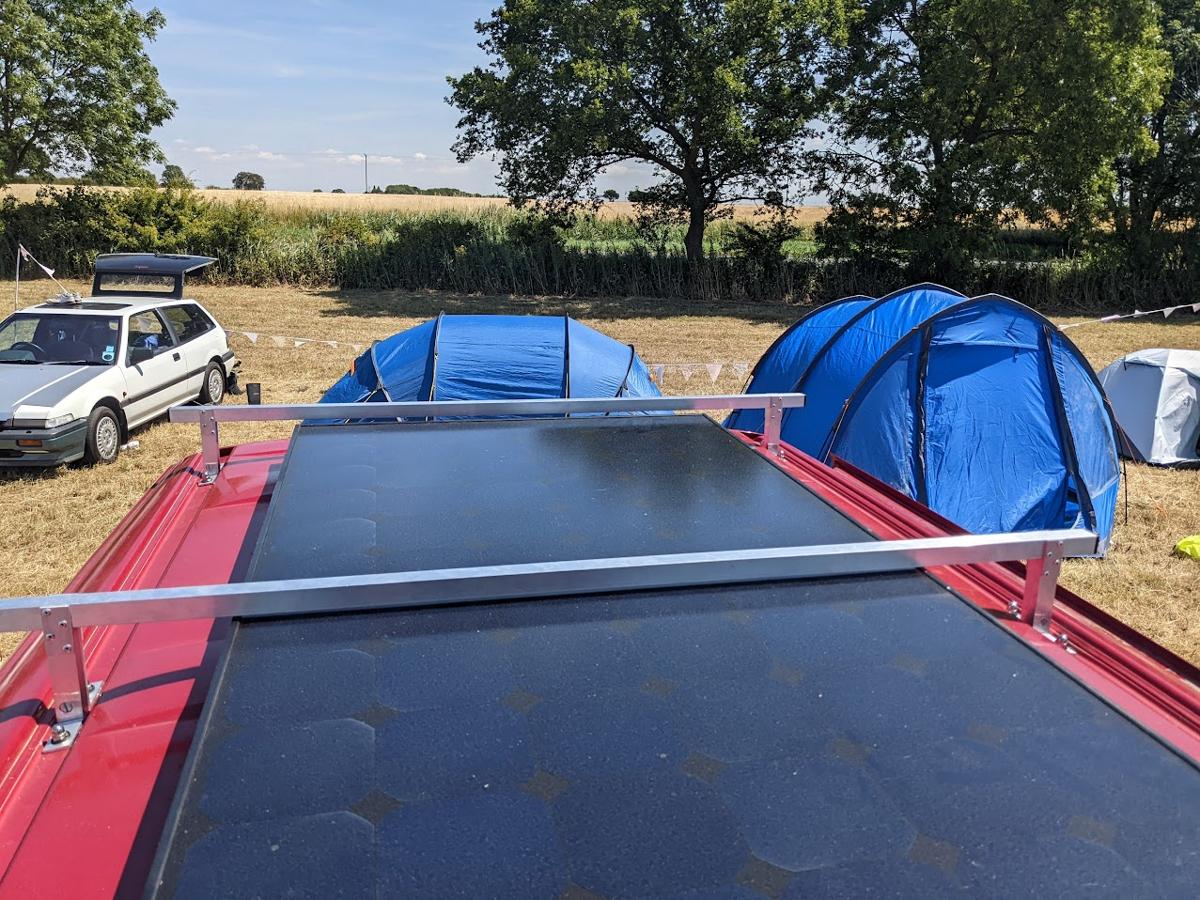
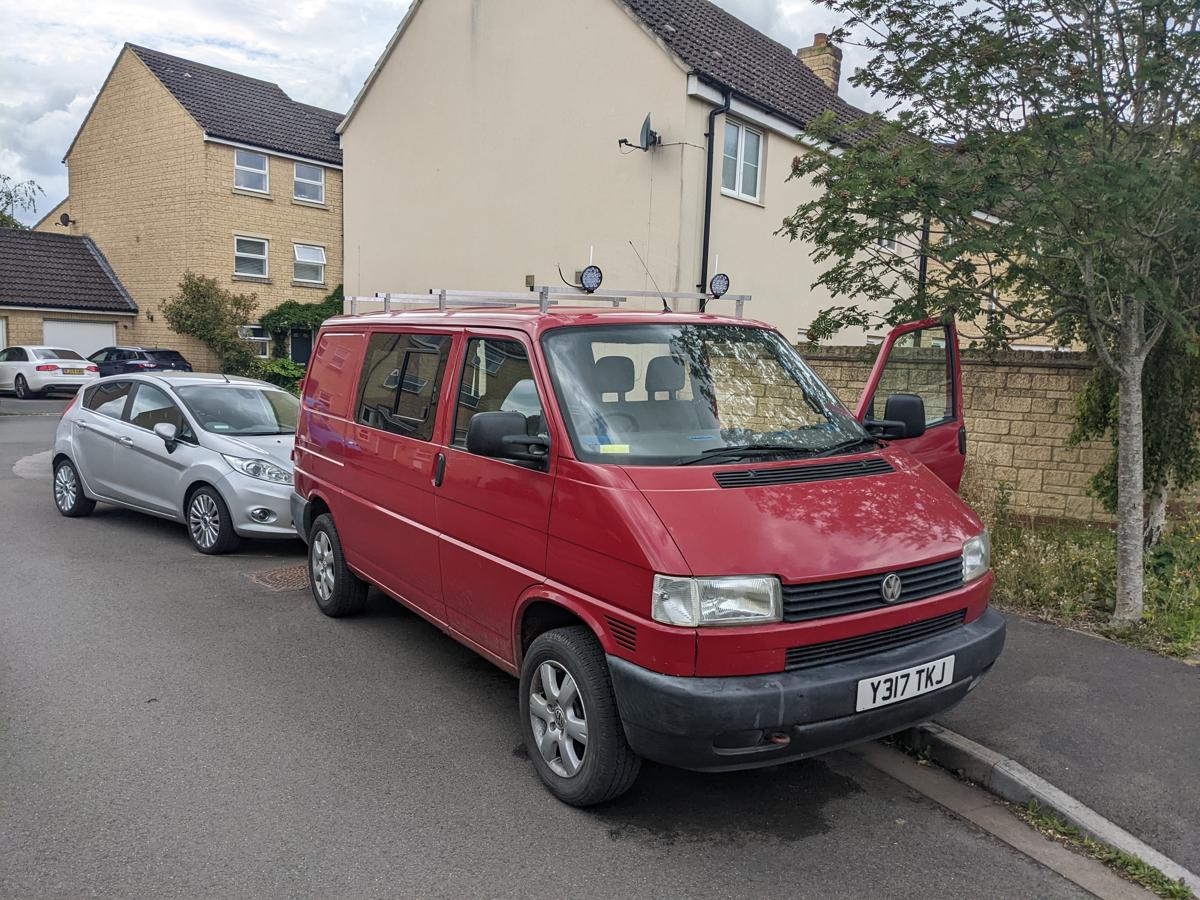
Around this time, I managed to get hold of a free solar panel that was been stripped from a local animal sanctuary (home of the Famed Malmesbury Police Emus). Unable to turn down such an opportunity, I decided to design a solar panel mount and roof rack set around the existing holes in the roof. While I don’t really have that much use for roof racks, it seemed a good way to deal with the unsightly holes while getting some practical value out of them.
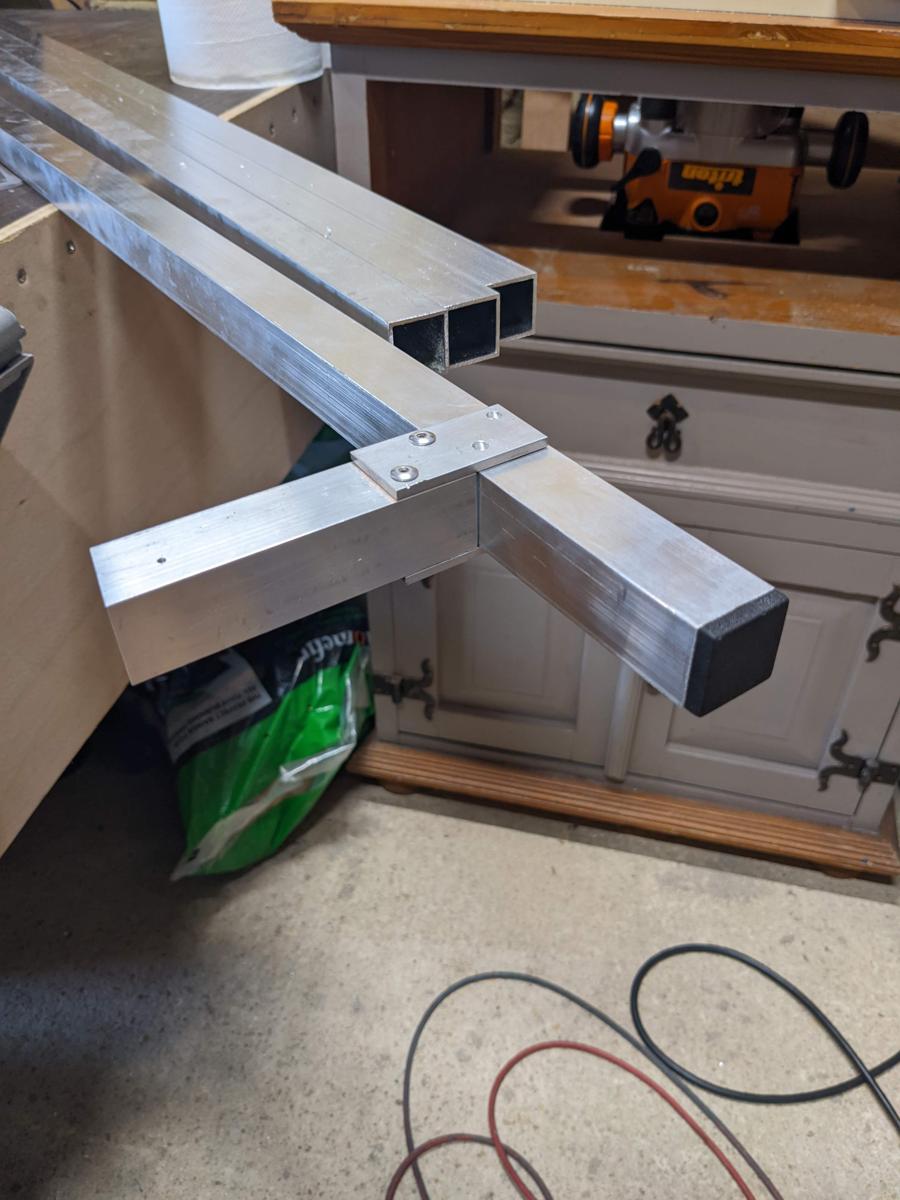
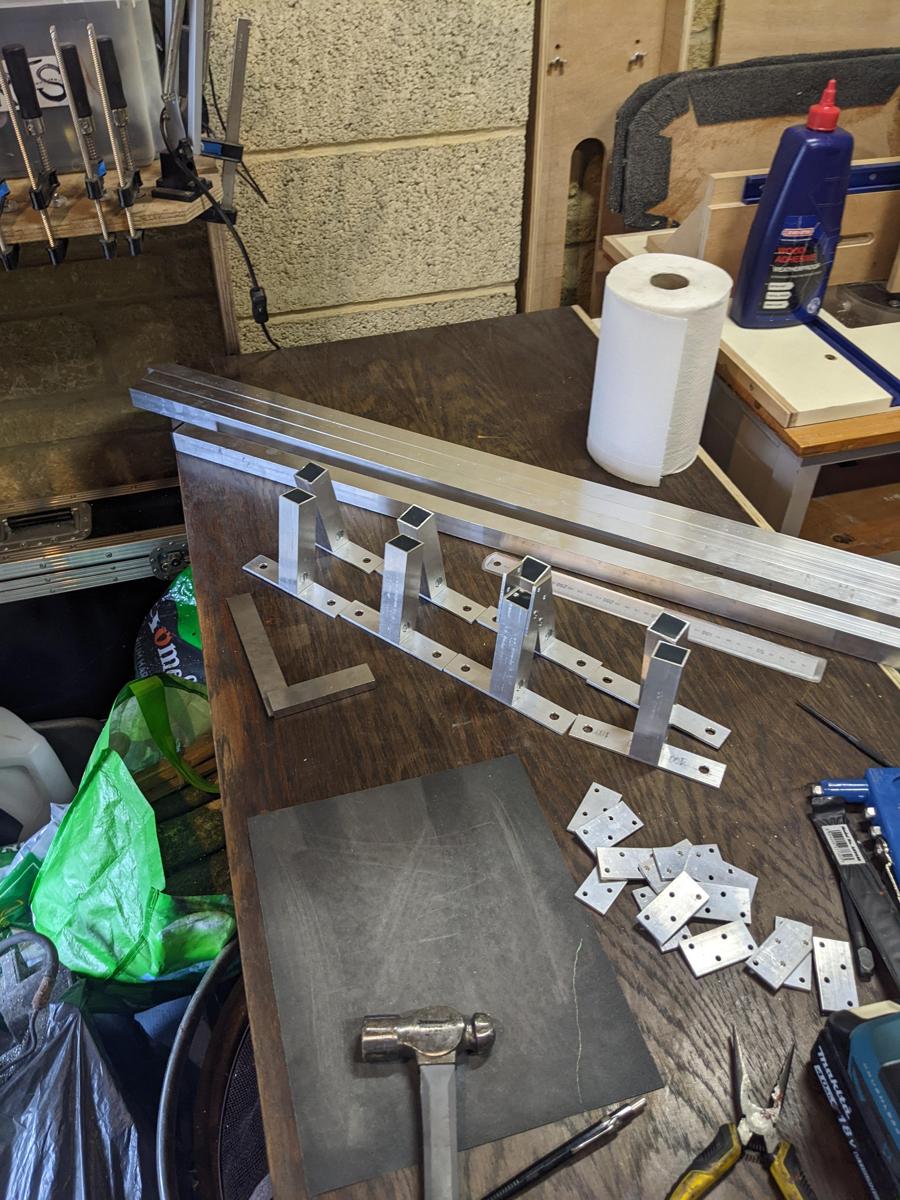
I chose to go with box aluminium and pop rivets for my roof rack construction. While a tad more time consuming than going with some welded box sections, it looks quite neat, plus has the added advantage of not needing to bother my friend with a TIG welder (who had already volunteered far too many hours in helping get this box of rust up and running in the first place!).
In the end, construction of all the struct ended up being quite a time-consuming affair. This wasn’t helped by the fact that the holes in the roof weren’t drilled at equal spacings, meaning each rack spoke needed to be a bespoke fit to the corresponding mounting points. The parts are mounted with rubber gaskets, solving the original leaking problem.
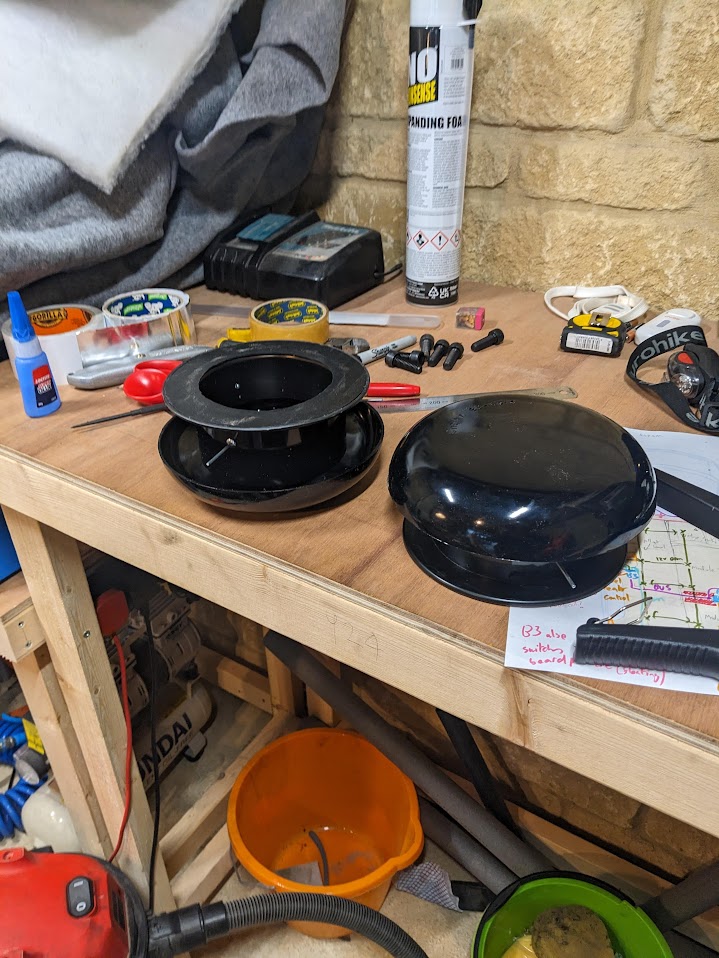
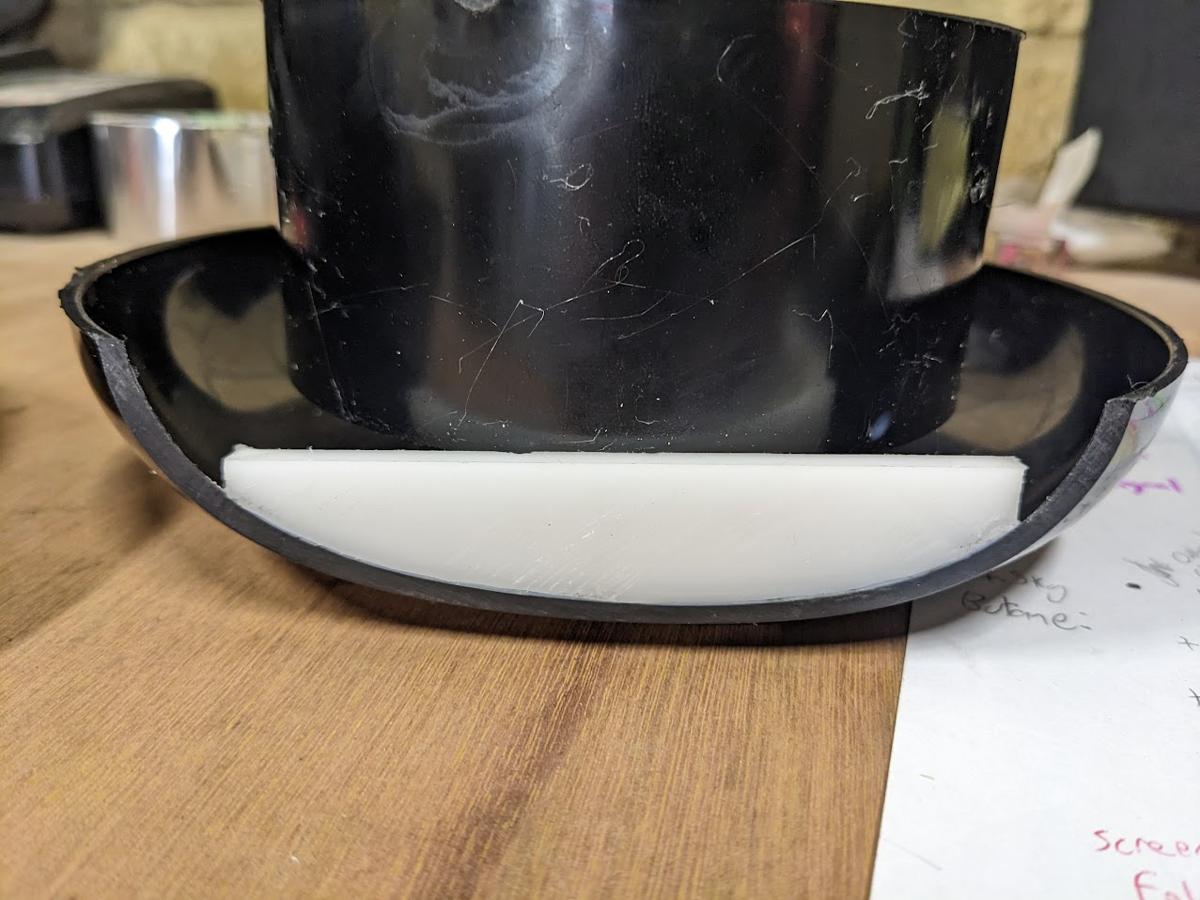
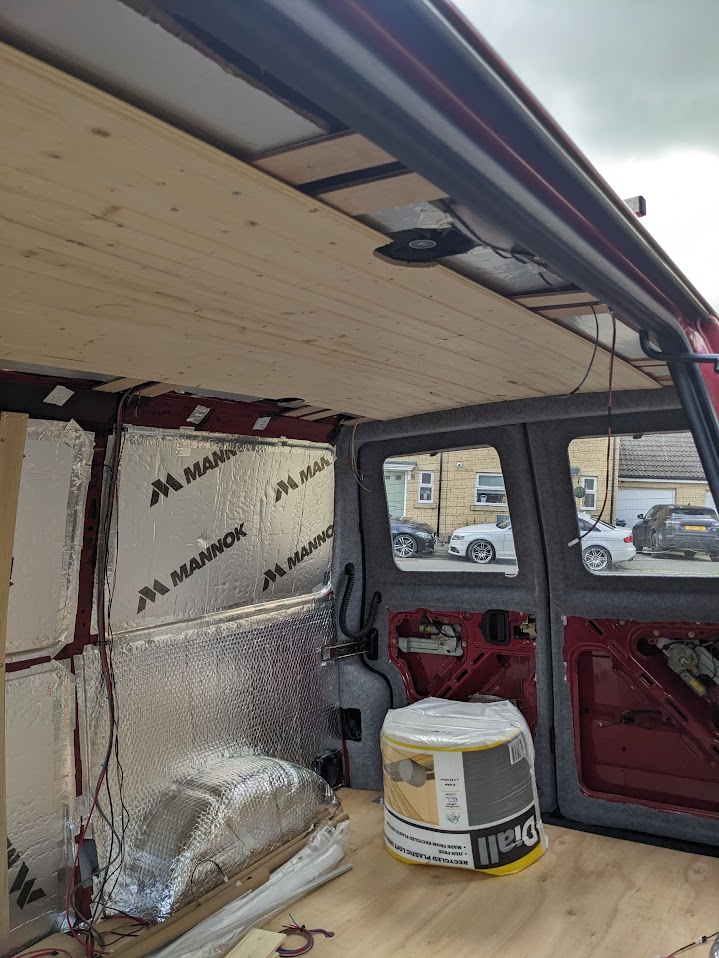
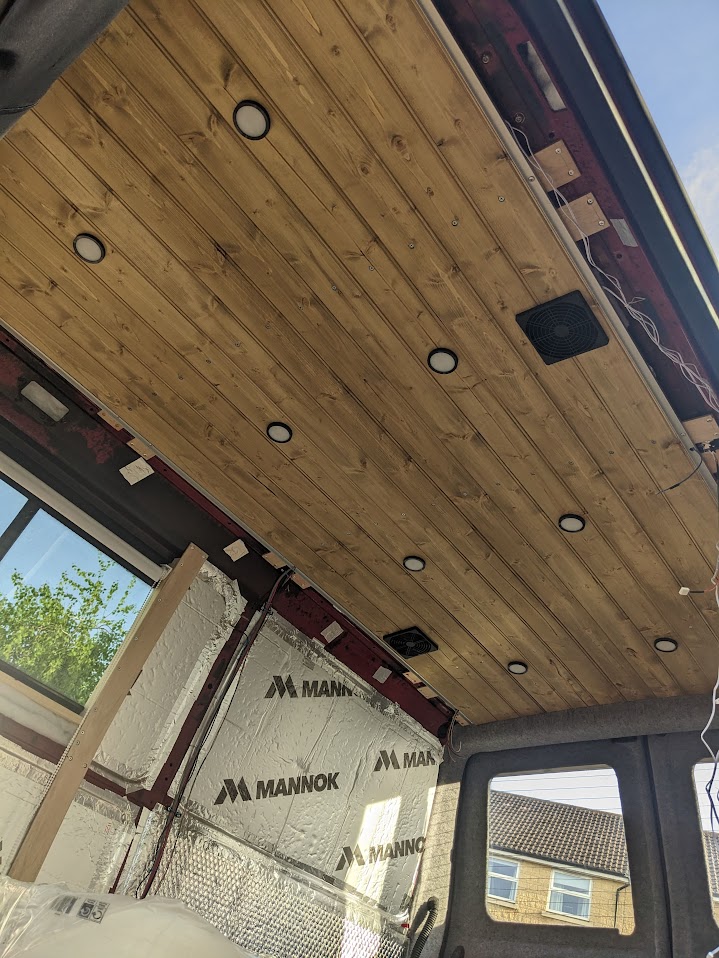
Next up was ventilation. As I was planning on installing cooking equipment inside the van, I decided that having a forced convection system was a good idea. PC fans are ideal for this as they are quiet, cheap and easy to run off a simple 12V electrical system. The stock T4 has two flap vents in the rear of the van near the floor, which I used as air inlets. For the outlets I used some modified plumbers fittings to make mushroom vents in the ceiling of the van. Unfortunately I was quite tight on space to fit them around my over-sized solar panel, so had to get creative with some nylon blocks and bathroom sealant to truncate the edges of the vents!
Behind the PC fans I also installed some retractable shutters that let me close the vents in the case that I want to do some extremely cold-weather camping!
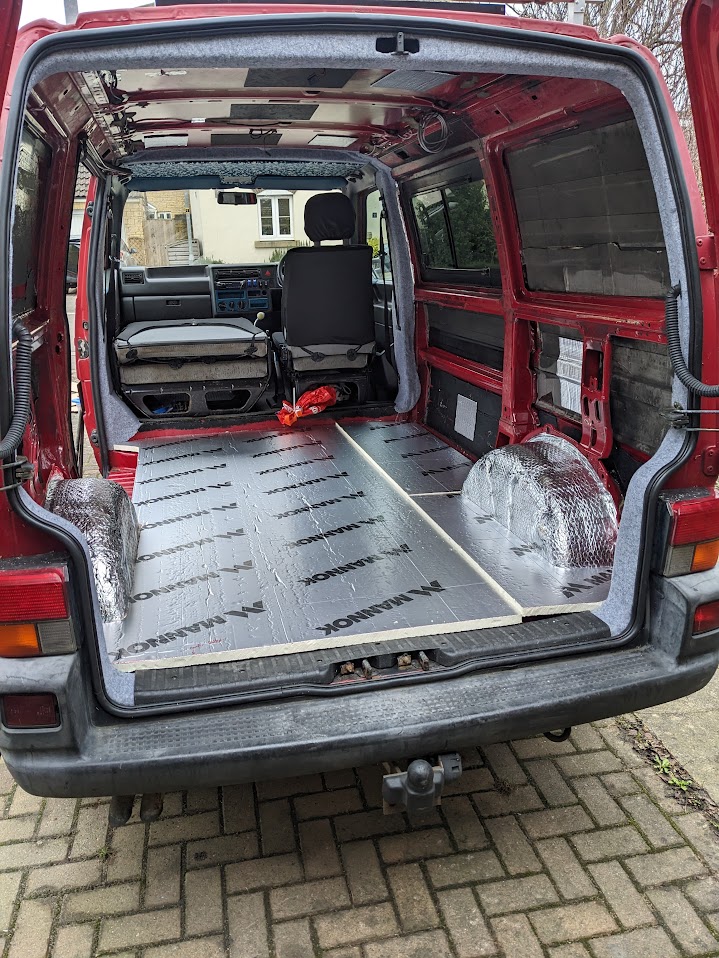
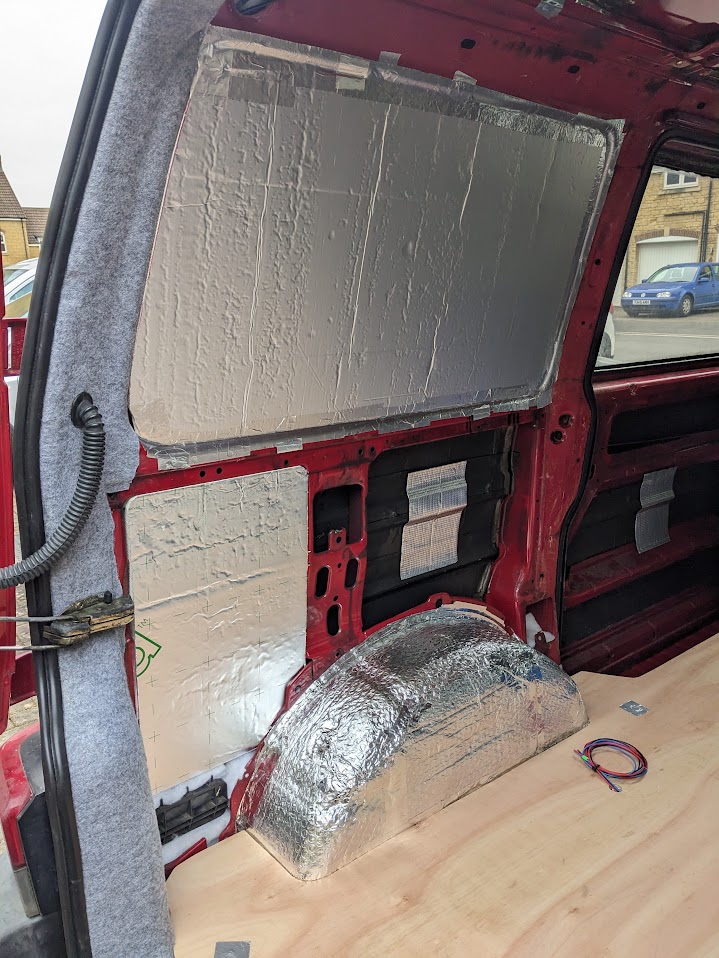
Now onto insulation. This is a hotly contested subject in the world of van conversions, with lots of different options to choose from. In the end I decided to go with stock 25mm Cellotex from my local builder’s merchant, with a small amount of polyester weave to fill in areas that are hard to fit flat sheets. The T4 is quite a boxy van, so using flat sheets is not too hard. On areas where there is a slight linear curve (e.g. the roof sections), I was able to get away with cutting thin relief cuts on the back, then using plywood ribs screwed into the cross-beams to keep the panels retained.
Cellotex in my opinion is a good way to go, as it’s relatively cheap (if you are friendly with your builder’s merchant!), plus you get a vapour barrier across most of the surfaces with little extra effort. The downside is that it isn’t exactly a pliable material, so is quite time-consuming to fit!

Before moving onto fitting some of the more fun furnishings, I had one extra problem to contend with. As mentioned in the last article, this van had actually been on fire at some point before I bought it. As a result all of the interior trim pieces were burnt beyond being usable. In addition, most of the exposed metal surfaces were covered in a layer of char / sticky gunk which was virtually impossible to remove. Getting replacement trim parts in my area ended up being very hit and miss: most of the parts listed are of very poor quality and quite expensive, not to mention usually a 2 hour drive away.
Instead, I decided to make life far more difficult for myself and make replacement trim panels and carpeting for every exposed surface in the van.
This turned out to take weeks of my spare time. All of the surfaces I was trying to cover were made up of complex curves, and without original parts to work from, I had to resort to lots of cardboard templating in order to get the new panels to fit neatly.
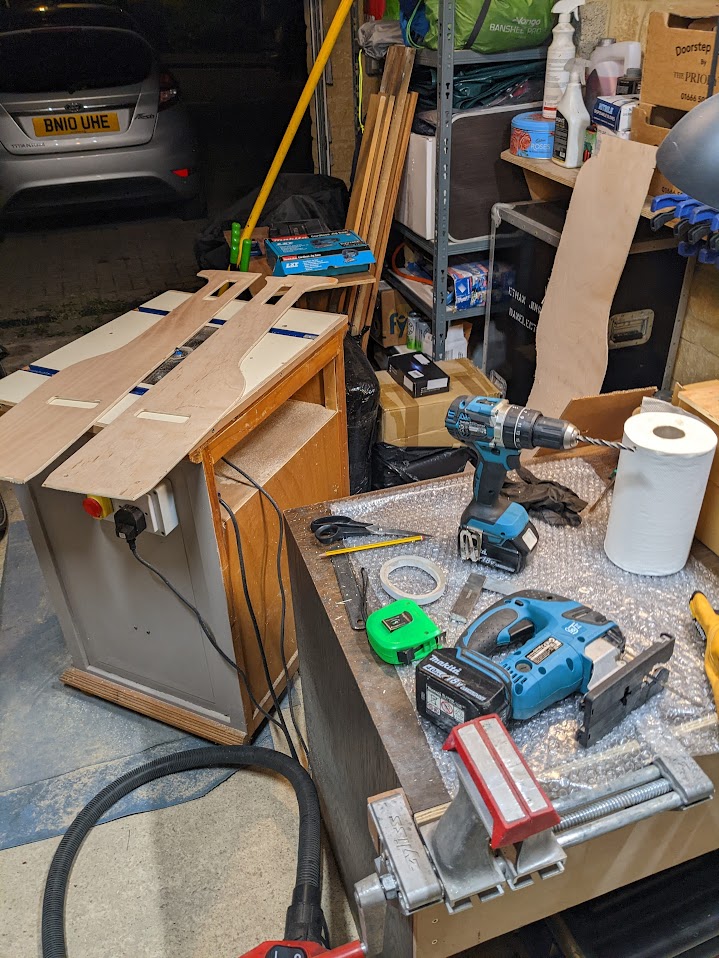
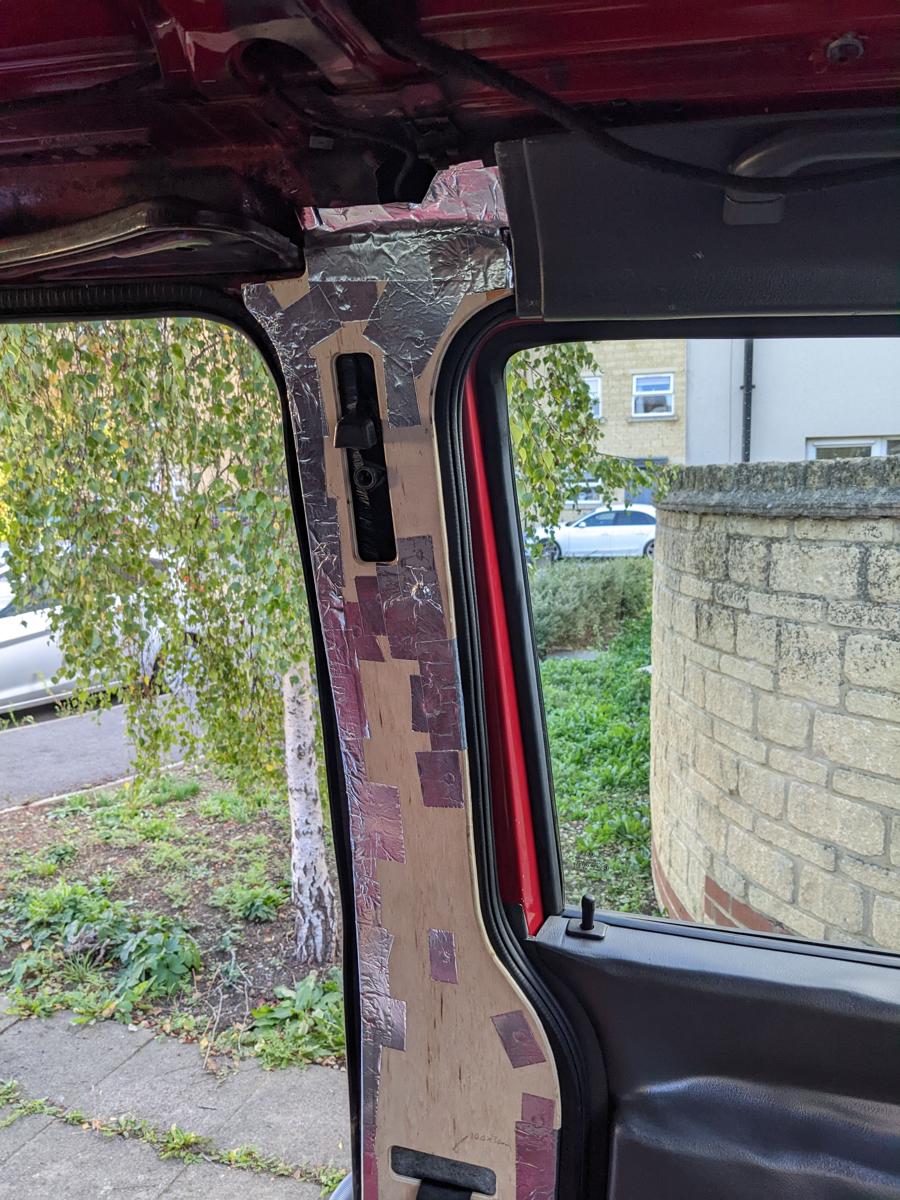
Below you can see probably the most awkward part of this process: the seatbelt pillar covers. These parts were the worst damaged by the fire, so I wanted the replacement panels to go right up to the edge of the door seals. For a job like this, a router table is a godsend, as it let me quickly make mirror copies once I’d got he first part to fit correctly, plus makes rounding over the corners very quick!
These panels were then installed into the van inner shell, and lots of metal tape was used to create a smooth surface to apply automotive carpet to. Dealing with automotive carpet was probably my least favourite part of the entire process, as getting the surfaces adhered with no wrinkles in the carpet is time consuming and ends up with your hands getting entirely gummed up with spray adhesive. I was very glad when this part of the build was over!
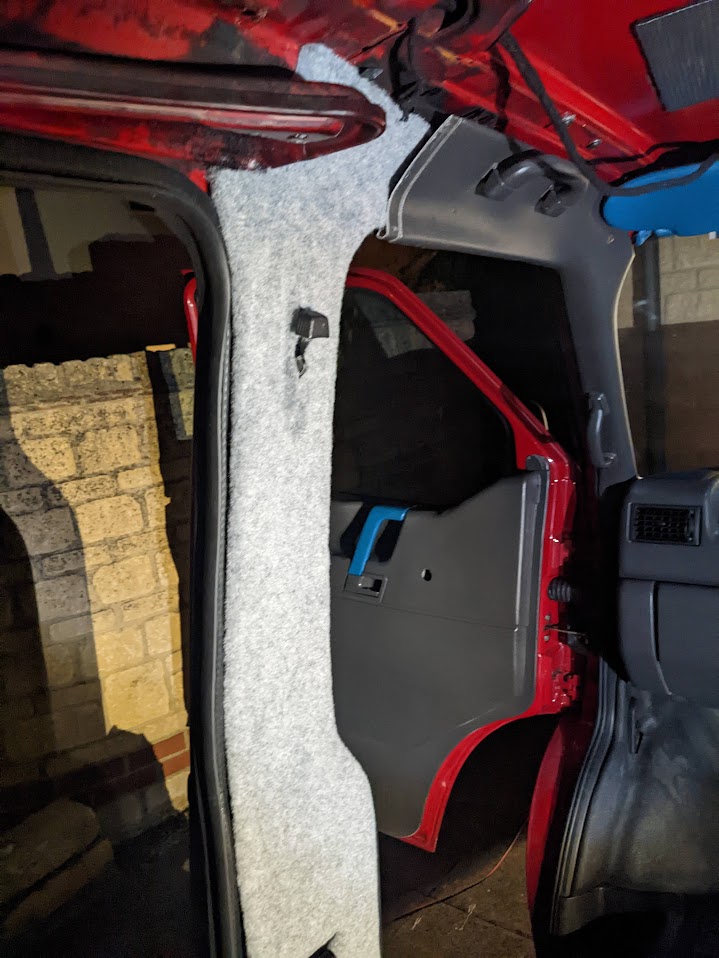
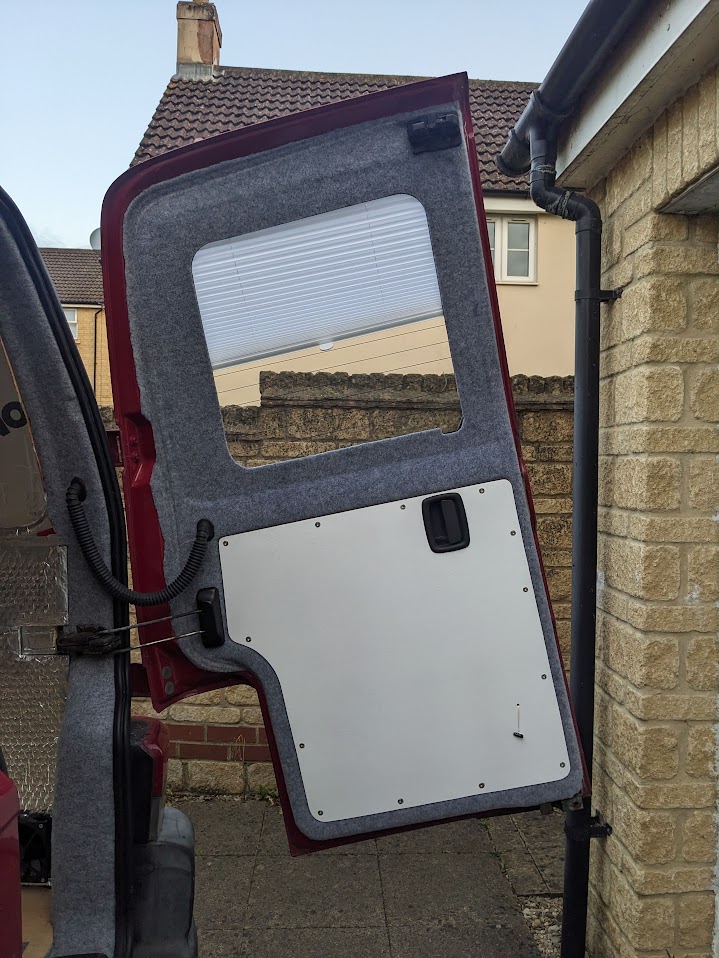
The back doors were a similar story. All the existing trim pieces were heavily fire damaged so I was virtually starting from scratch again. Once again, no end of sins can be hidden with automotive carpet!
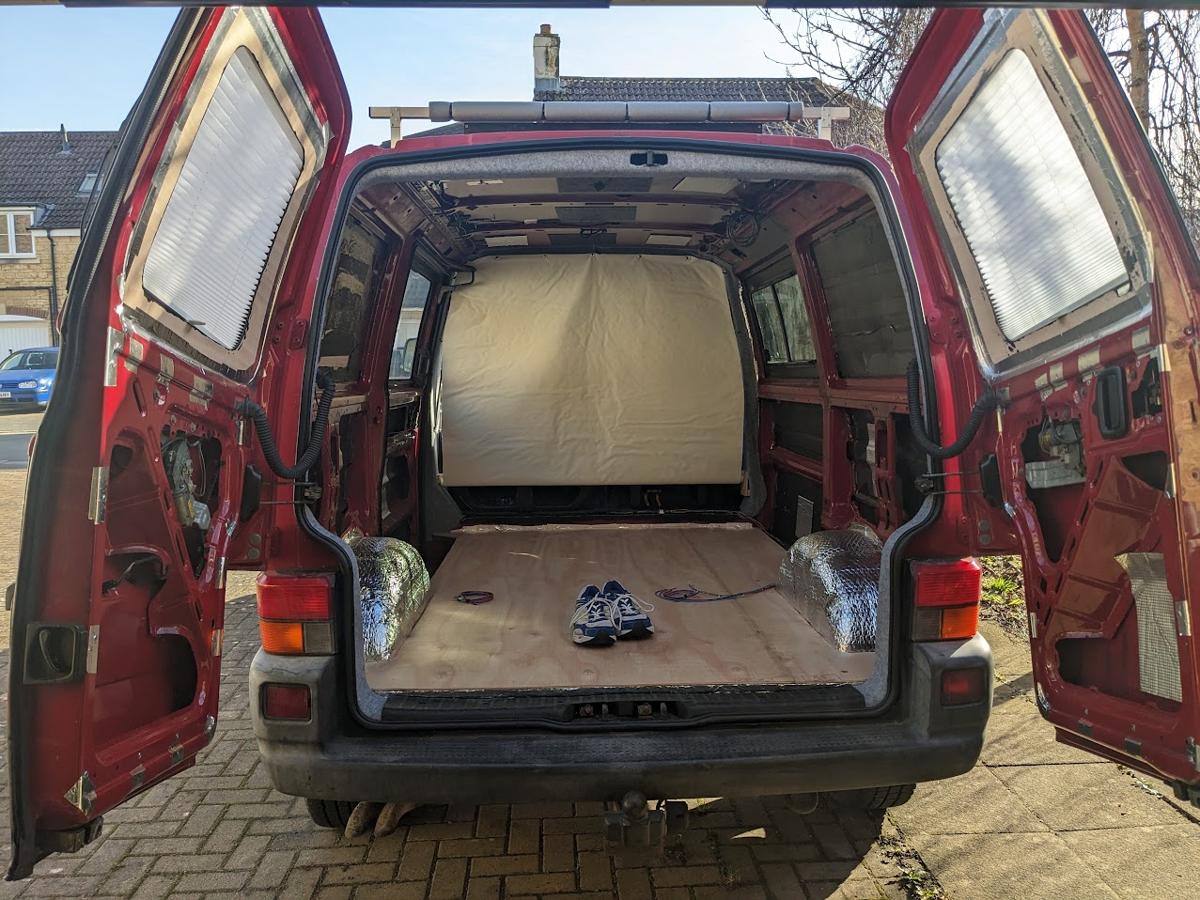
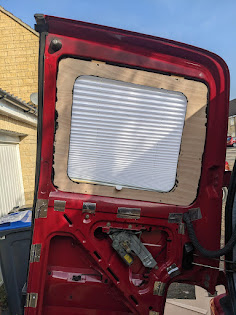
The T4 window areas actually have relatively deep recesses, so I thought that this was the ideal opportunity for some drawstring pleated blinds. These are fairly neat options for van conversions as they can be run in a recess to follow the slight curve of the windows. By having the edges of the blinds secured behind the trim, they don’t rattle while driving along, plus it (probably) helps cut down on heat loss from the windows via convection. Below you can see a picture of the finished back doors, looking quite tidy with a new spray-painted door panel.
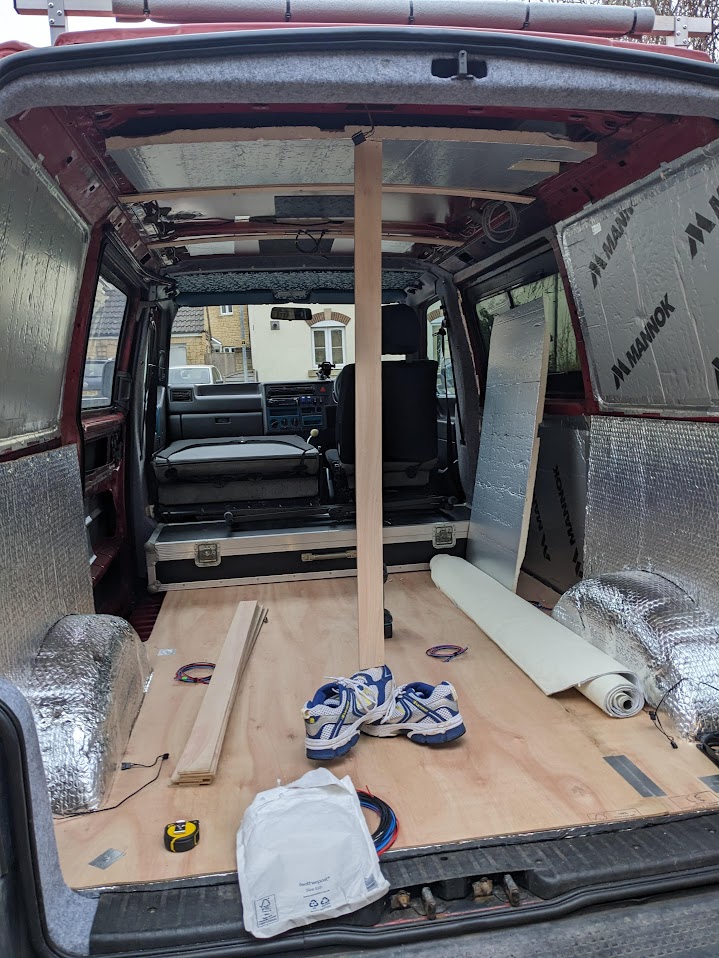
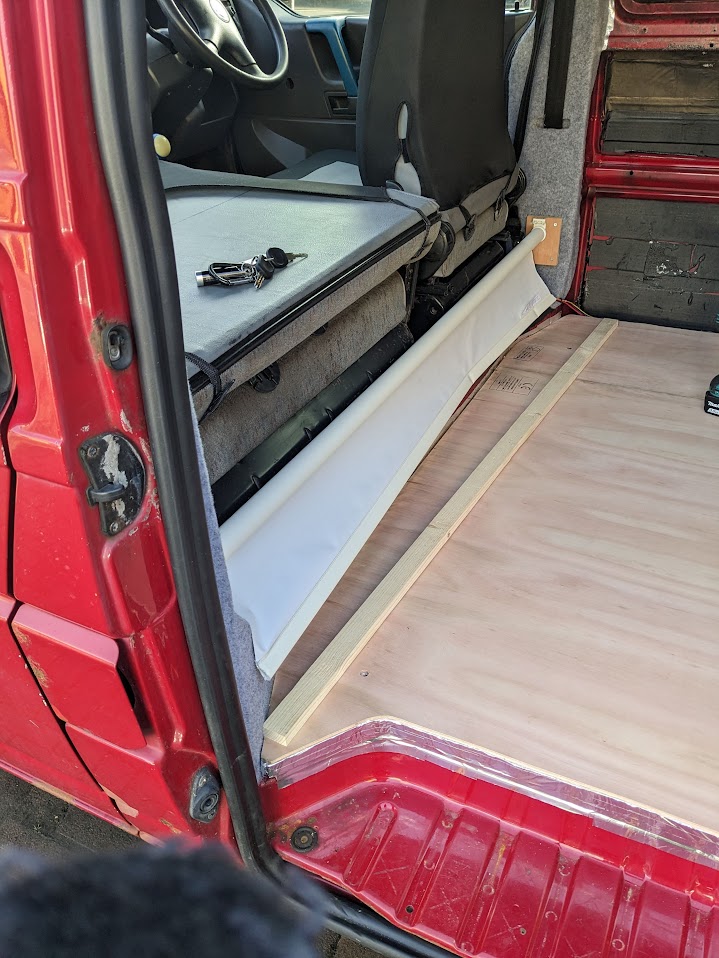
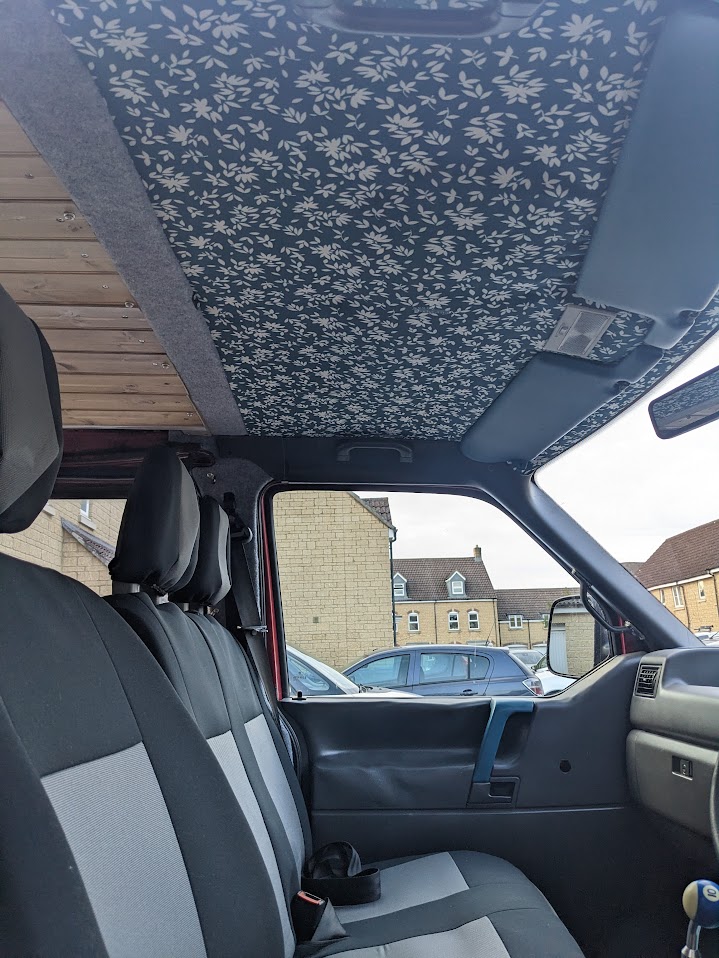
In addition I wanted to have some form of insulation isolation between the front driver’s cabin and the back of a vehicle. A T4 isn’t really big enough to put in a fixed bulkhead between the front and back, but at the same time, the van’s front cabin is the least insulated part of the vehicle and I wanted something a bit more insulating than a set of curtains between the front and back.
What I settled on in the end was a spring-loaded curtain that pulls up from the floor to create a more rigid partition. I glued thermal insulation fabric to the back of this blind for good measure!


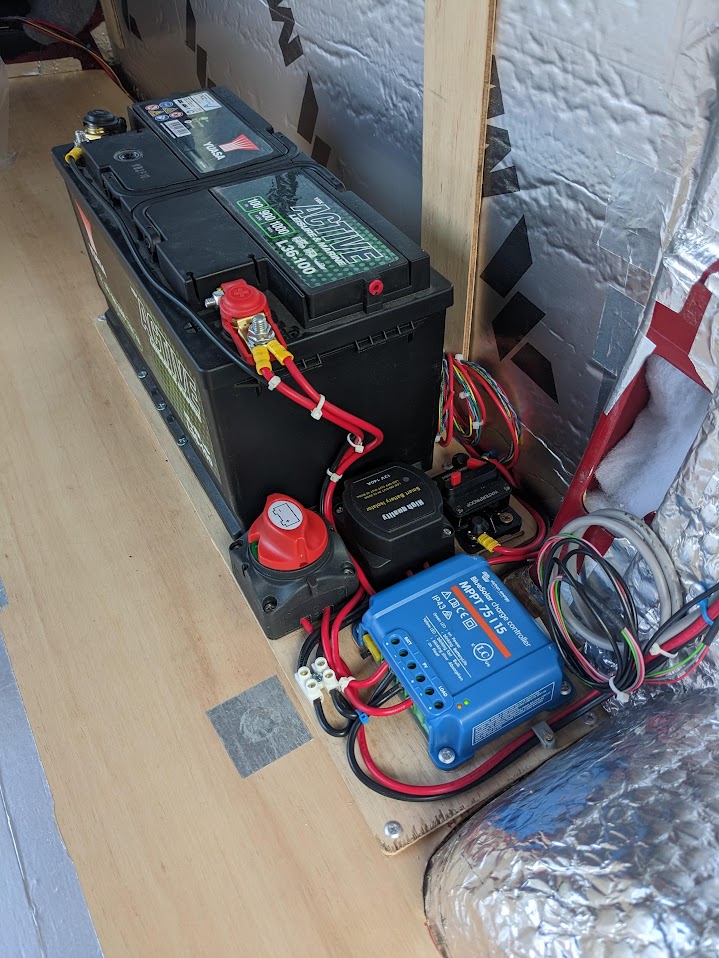
The electrical installation of this van is nothing special. From the get-go I’d decided against having a mains inverter in the vehicle and instead went for a full 12V-only system. The wiring consists of a solar inverter, a leisure battery and a simple split charger tapped into the van’s engine bay battery.
In addition, I had designed a full distributed control system for things like the fan control, lighting, etc. Each board had an RS485 connection for inter-board comms, allowing me to control any parameter from any point. The main motivation for this was knowing that I would have forgotten to run at least one cable when fitting the insulation, so at least with this scheme I could still have some freedom of running new fittings to the nearest board with an RS485 connection, then worry later about where the corresponding controls would be. I never finished building these control boards, but I have some PCB files available if you are interested in building your own.
If you are doing your own conversion, I can’t stress enough the importance of planning cable routes before starting the internal fit-out. Trying to route cables afterwards using pull wires and welding rod is not a fun experience…

Next up was the job of internal cladding and ceiling lights. This is a very well documented process online, so I won’t go into detail here, but the one process I want to highlight is the wood finish.
A lot of van conversions will simply apply a layer of clear lacquer to the cladding slats, or even go with no finish at all. There’s nothing wrong with this approach, but I’ve alway’s felt that the result ends up looking like an alpine sauna. That’s not really my vibe, so I decided to try to create a “weathered” look.
To do this, I first fitted the entire roof to get all the cut outs in the right place. Then I took out all of the panels and air-sprayed them with a mix of 70% satin varnish and thinner. After sanding this back a little, I finished off with a coat of transparent lacquer. The result is a reasonably nice looking finish which should hold up reasonably well to moisture inside the van.
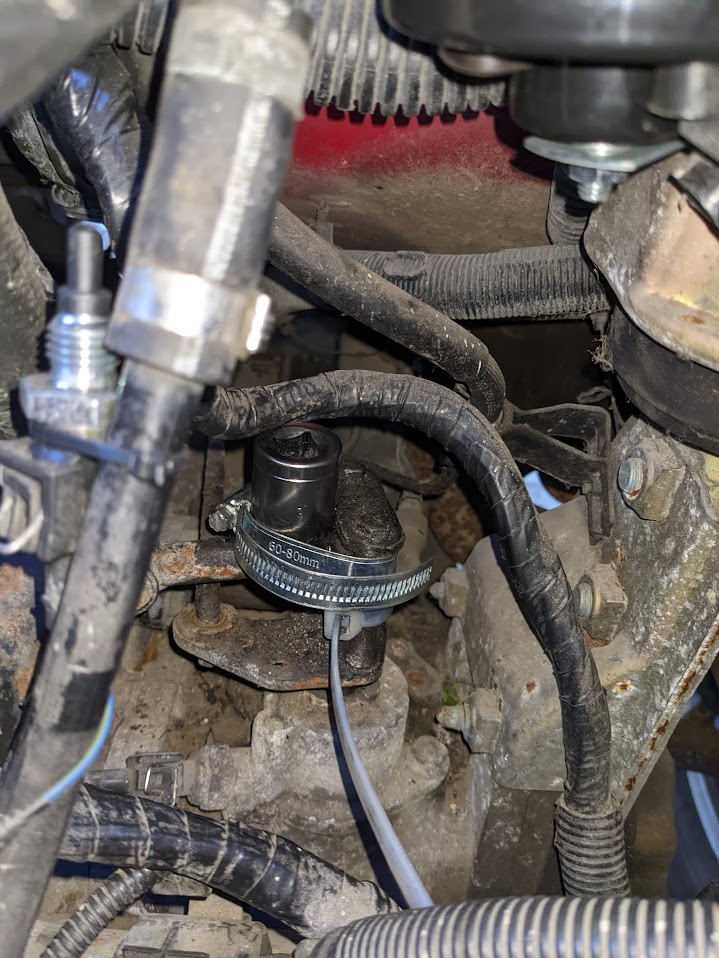
So far all looking quite promising! However I’m sad to say that this was as far as I got with the conversion in the time that I owned the van. The reason for this was that it turns out that restoring this 20 year old van ended up the equivalent of trying to perform a grand designs conversion on a house that was built on a sand dune. The combination of a fairly rusty specimen and an incredibly inept previous owner meant that things were continually going wrong with the vehicle while I undertook the conversion. Below are just a few of the incidents that occurred in the first 2 years of ownership:
- The primary gearstick linkage failed while driving down a hill, giving me only even-numbered gears to get home.
- The sliding door fell off while driving
- The exhaust rusted through and snapped
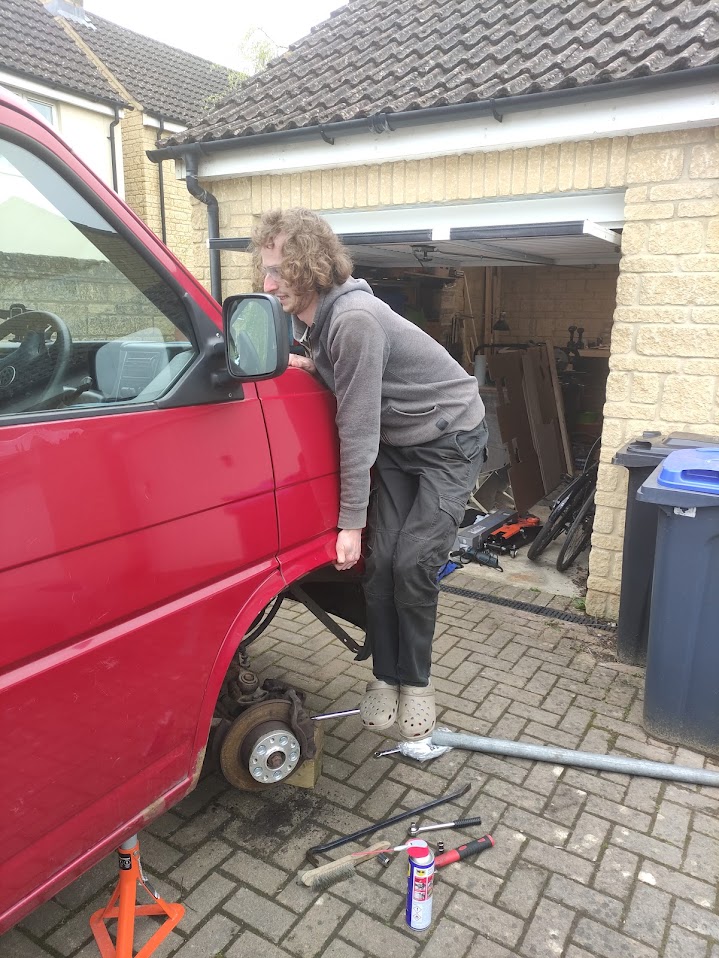
- Every single suspension fitting had disintegrated, and changing them required a lot of battling with rusted fittings.
- The front wheel bearings needed replacement
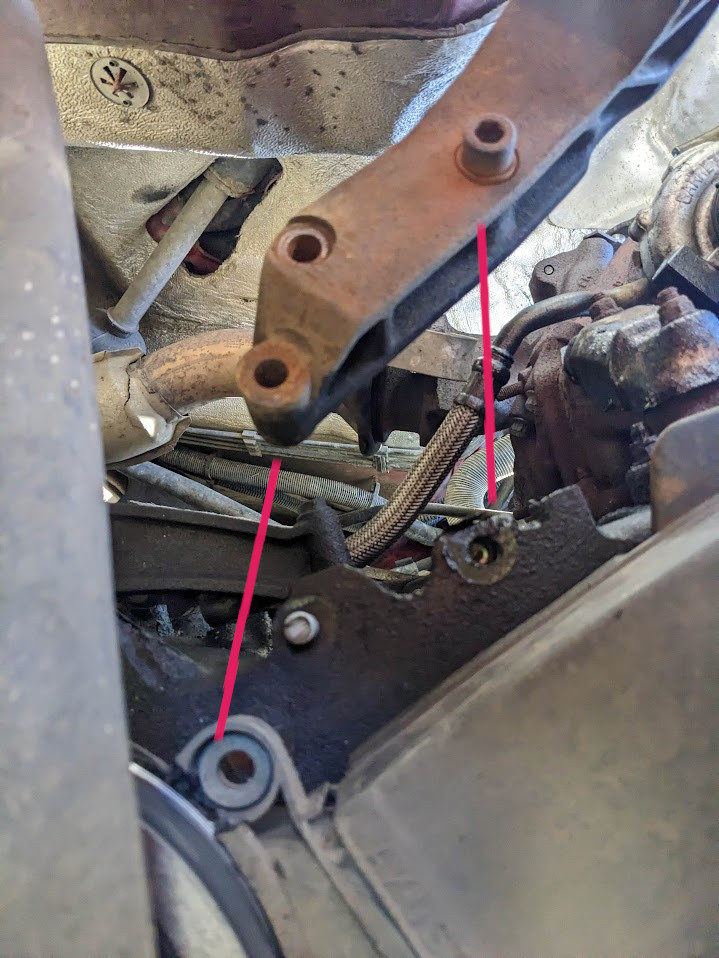
All of this culminated in the grand catastrophe of the engine falling out while driving in Snowdonia (conveniently in an area with no signal). On inspection afterwards, it turned out that the previous owner who had done the engine swap had not tapped the mount holes to full depth, eventually causing the threads to pull out and my engine to drop about a foot.
This combined with various shortcuts taken by the previous owner (improperly fitted window seals, badly installed panels, etc…) eventually drove me to the point of despair.

As it happens, I was about to take up a work contract in South East Asia, so as much as it saddened me, my most sensible move at this point was to sell the van before leaving.
On reflection, it would have been far more sensible for me to have spent an extra £2000 on the base van, rather than trying to convert the cheapest specimen that I could find. While the interior looked lovely when I sold it, I only really got 4-5 long trips out of the vehicle in the entire time I owned it. At the time of publication it looks like the van has still got a valid MOT, so someone’s hopefully getting better use out of it than I did.
Another realisation I came to while doing the campervan conversion was that I actually really like camping outdoors! On most of the trips I went on I would have just as gladly camped outside rather than stayed in my van. Suffice to say I think that my next “campervan” setup will probably just be a Volvo with some camping equipment in the back…
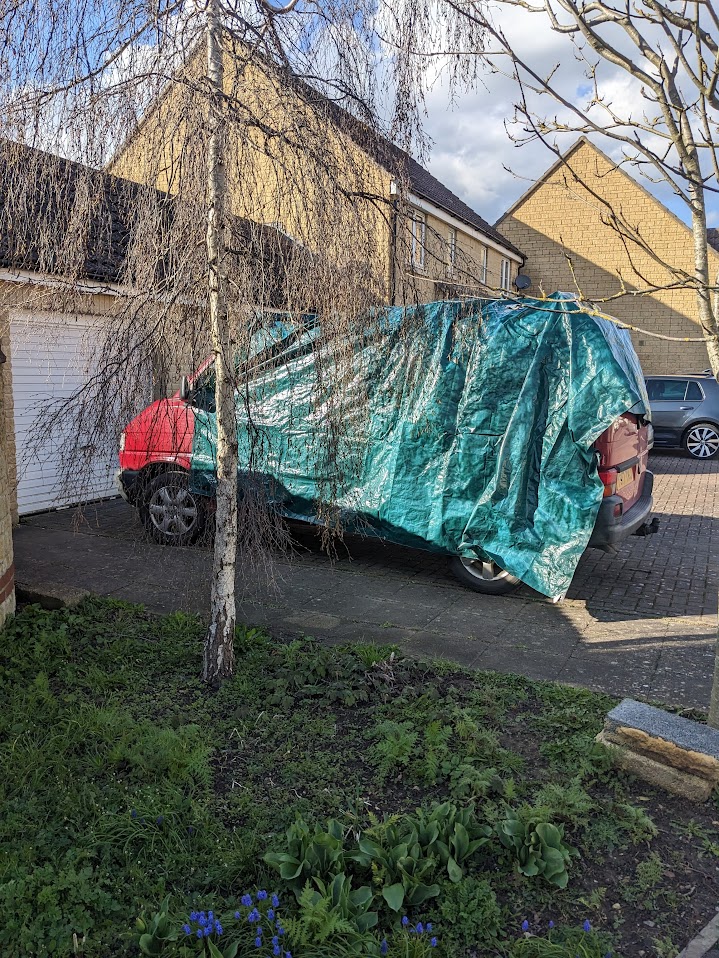
Regardless, I hope you enjoyed coming on the journey of the conversion with me! I’ll leave you with one final image of the van in all its glory just before we parted ways.