Custom MagicQ Wing
25-11-2017
For most of my lighting programming, I use a program called MagicQ. It is very powerful software, and you can get 64 universes of DMX out over Artnet for free. The software that you can download from their website is exactly the same as the software that runs on their consoles, the only difference is the hardware. Their consoles are great for busking in clubs and festivals, but for school shows I could not really justify hiring one in. Chamsys do sell hardware wings to work with the PC software, but the free version also has a useful tool for creating keyboard macros. I had our school ‘Battle of the Bands’ competition coming up, so decided to DIY the wing to give myself a bit more control over the show than a keyboard would provide. While the outcome is quite quirky and relies on using virtually every key in the standard HID library, making typing somewhat tricky, it gets a surprising amount of use, and I can be much less precious about this creation than I would be with an MQ60 console.

The core of this project was the Arduino Pro Micro. This small board uses the ATMega32u4 chip, which unlike the ATMega328p used on the Arduino Uno and the Nano has an integrated USB core. This means that in contrast to using an onboard USB->Serial converter, the ATMega32u4 can communicate directly over USB, so can act as an HID device. By using this board I was able to map all the keys on my wing to ‘physical’ keys, meaning I do not have to use any software like AutoHotkey. Obviously, the number of pins on the Pro Micro is insufficient for the number of switches on the wing, so I used 74HC595 shift registers to multiplex the keys as a grid, much like a regular computer keyboard. For the keys I used the cheapest mechanical keys I could find on EBay, and wired the entire matrix point-to-point without a PCB. Below you can see the mess that that resulted in, but the construction has been surprisingly reliable so far…
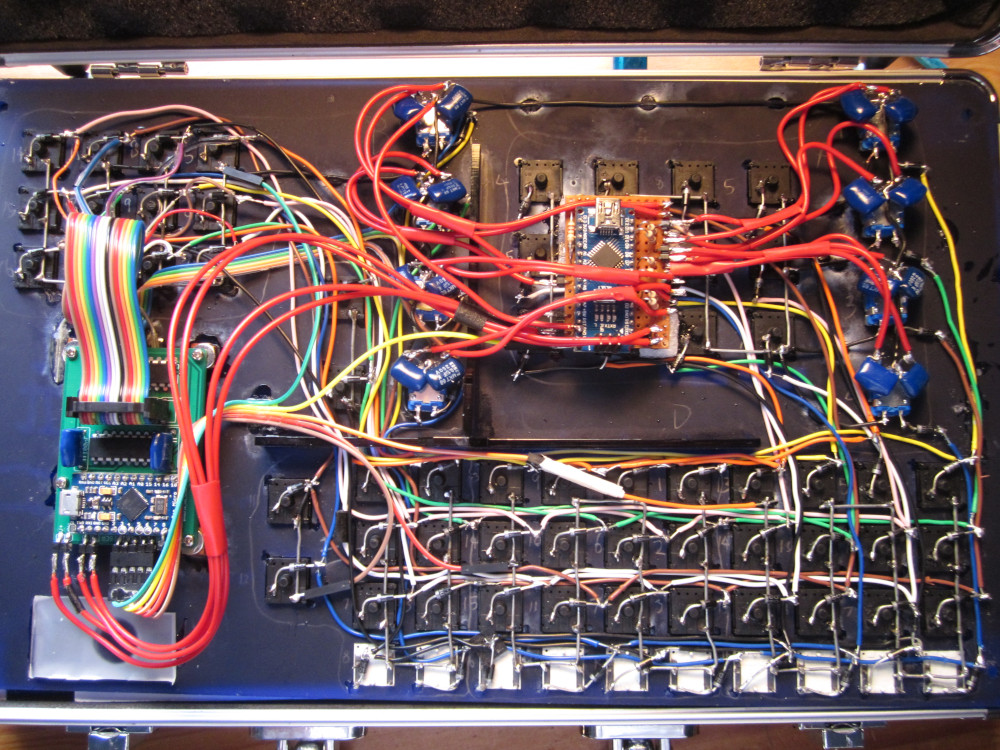
In the picture above you may also notice the other Arduino Nano hanging precariously on a piece of breadboard. This was a bit of an experiment in adding Encoder support to my Wing. While MagicQ macros don’t really allow for absolute value automation (playback faders, grandmaster, etc…), incremental movements are possible by setting one macro to turn the encoder one turn clockwise, and another to turn it anticlockwise. The Arduino Nano essentially monitors state changes on all 8 encoders, then forwards HID values over serial to the Arduino Pro Micro, which subsequently turns them into keyboard commands. This approach is very finnicky, and does not allow encoder velocity control, but the X and Y encoders are just about usable for moving head Pan and Tilt control. For the heart of the controller, I decided to try one of those online PCB fabrication services, and the ordered boards vastly simplified the building and debugging of this project.

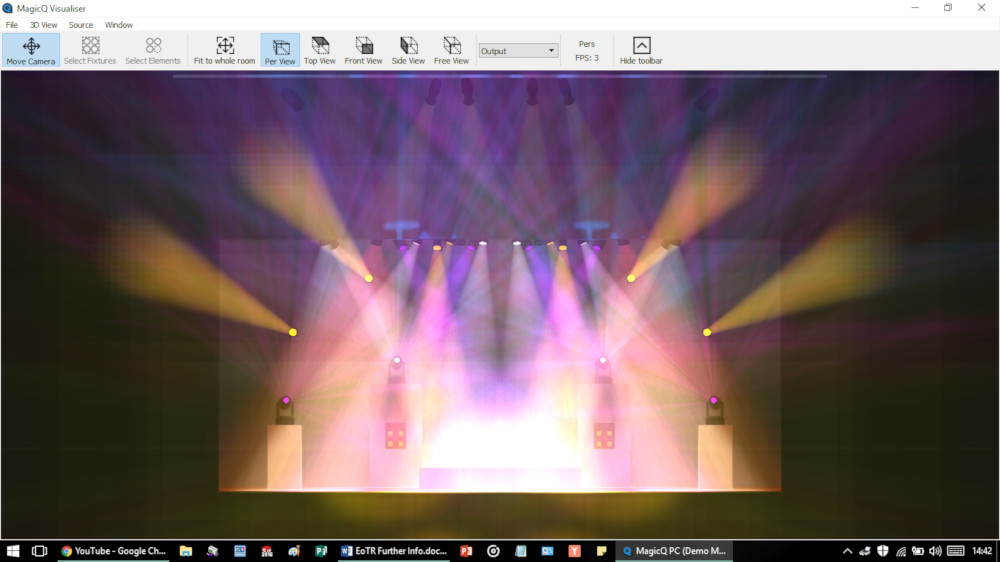
I did this project quite a while ago, while I was still quite new to C++, so the code is really badly written, but I have attached the project sketch here, just in case anyone is interested. Unfortunately MagicQ does not allow the use of the extended USB HID library so all the macros have to be set onto keys that are used for typing and programming. It is therefore advisable to create a button in MagicQ that toggles macros on and off. While this DIY wing is not a substitute for a real desk, it makes a very handy extra set of buttons that can be used for macros. To use it to run a show, I have to change the way I program shows: With no faders as intensity masters, I have to re-map many of the playback keys to control crossfades and change between intensity presets. This makes busking quite difficult, but given enough time to program, I can control quite large,complex shows. Below is a picture of the pre-programming/visualisation for our ‘Battle of the Bands’ competition, along with a picture of the performance below that. One feature that is invaluable to have as a physical is the ‘Preload Cue’ button. This feature, paired with the homemade wing, allows me to program in a ‘look’ from my various stacks, then trigger them with a single button. Even on the high-end consoles this feature is only operable with a soft-button on the touchscreen.
As a quick disclaimer, I am not advocating ‘exploiting’ MagicQ in this way. Chamsys very generously make the software free to use, and they fund this with sales of their hardware. I would highly encourage buying/renting their hardware for large shows, as this is what allows them to keep the software free. However, a project like this is very good for getting a deeper understanding of USB HID, and can be used on a slightly smaller scale to add functionality to the Chamsys desks that was not there previously. I do have future plans to make a version 2.0, but this wing still covers all the shows that I have to deal with in a school theatre.